Welcome back fellow artists!
In today’s post we are doing to go over the top 5 things you can do to improve your figure drawings fast. Let’s get started!
Step 1 – Draw Lots of Gestures to Warm up Each Day!

Gesture drawing is pretty much the secret sauce to figure drawing. You can’t have a great figure that lacks gesture. It will come off as looking stiff and lifeless.
Also, when you take the time to warm up with 3-5 minutes sketches of a variety of poses your imagination becomes charged. The magic truly happens with the rough sketch and the rough sketch needs a good sense of gesture.
Think of it like the blue print that will guide you through the rest of the illustration. Don’t rush past it or your end result will suffer! Also, don’t think they need need to look clean and polished. That isn’t the point. Generally when we clean things up and over render we lose some of the energy anyways.
Here are some tips for great gestures. Study from life but don’t get caught up in the details. Grab the main aspects of energy and flow through the body. Use quick sweeping curves. Simplify as much as possible. Less is more at this stage.
Focus on the curve of the spine. Try to start with one main line through the entire pose, then add to it. This is know as the “Action Line.” Not every line and form will adhere to it but it can help you to reduce the entire body to its most basic sense of movement. Then add the other forms from there but keep them simple and gestural.
Step 2 – Simplify with Primitive Forms
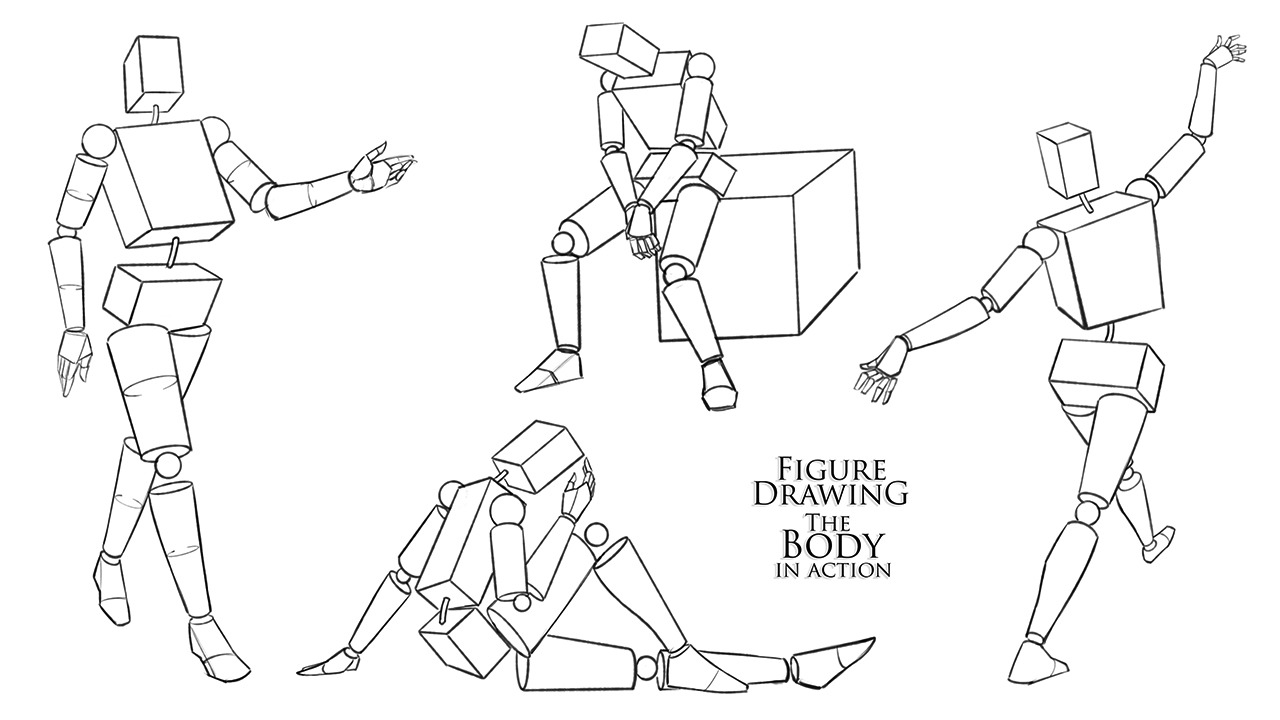
Drawing the human form can be a complex task so we need to simply the process sometimes. You ever try drawing a body in perspective. It can be tough to envision where everything goes.
We have to remember and orchestrate a lot of things at once. A technique that helps with part of this process is drawing they figure with primitive forms also known as “Stereometric Drawing.”
This can help with perspective, proportions, placement of the anatomy, and consistency with our figures. By simplifying the human body with prisms we can give ourselves some guidelines to place all those glorious details upon.
This isn’t a technique that I tend to use for every figure drawing but there are certain camera angles and foreshortened shots that make me quickly remember how important this method can be.
Tip #3 – Study Proportions!!!
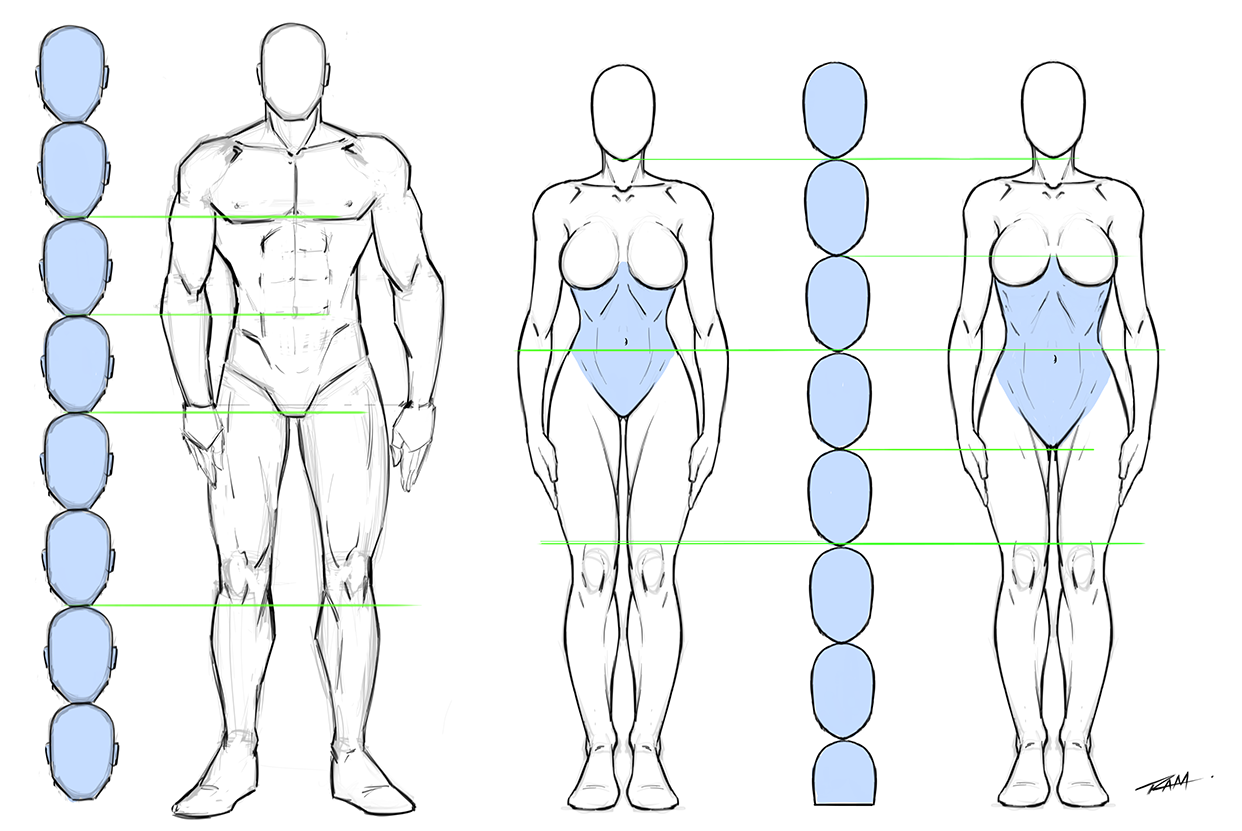
Proportions can be highly subjective since we come in all different shapes and sizes. Still, it helps to have some guidelines to follow to spot errors in the work and have some consistency in your figure drawings.
Notice in the illustration above that I am marking parts of the figure by using the head as a tool of measurement. This allows me to see that my first attempt at the female form was a bit too short in the upper torso area. The second example puts the lower pelvis at approximately the half way point from head to toe.
There have been lots of various ways of measuring the human figure over the years. Some have even used the middle finger as a unit of measurement. For instance for the male figure, the 8 heads tall model works really well. 2 heads down from the top is the nipple. 3 heads down is the navel. 4 heads down is the bottom of the pelvis and so on. Oh yeah, and did you know that most of us have the same wing span from finger tip to finger tip as our own height?
Some of these forms of measurement are easier to remember that you might think. Andrew Loomis has some great methods in his book, “Figure Drawing – For All it’s Worth.” ( Amazon affiliate link )
Tip #4 – Know Your Anatomy!
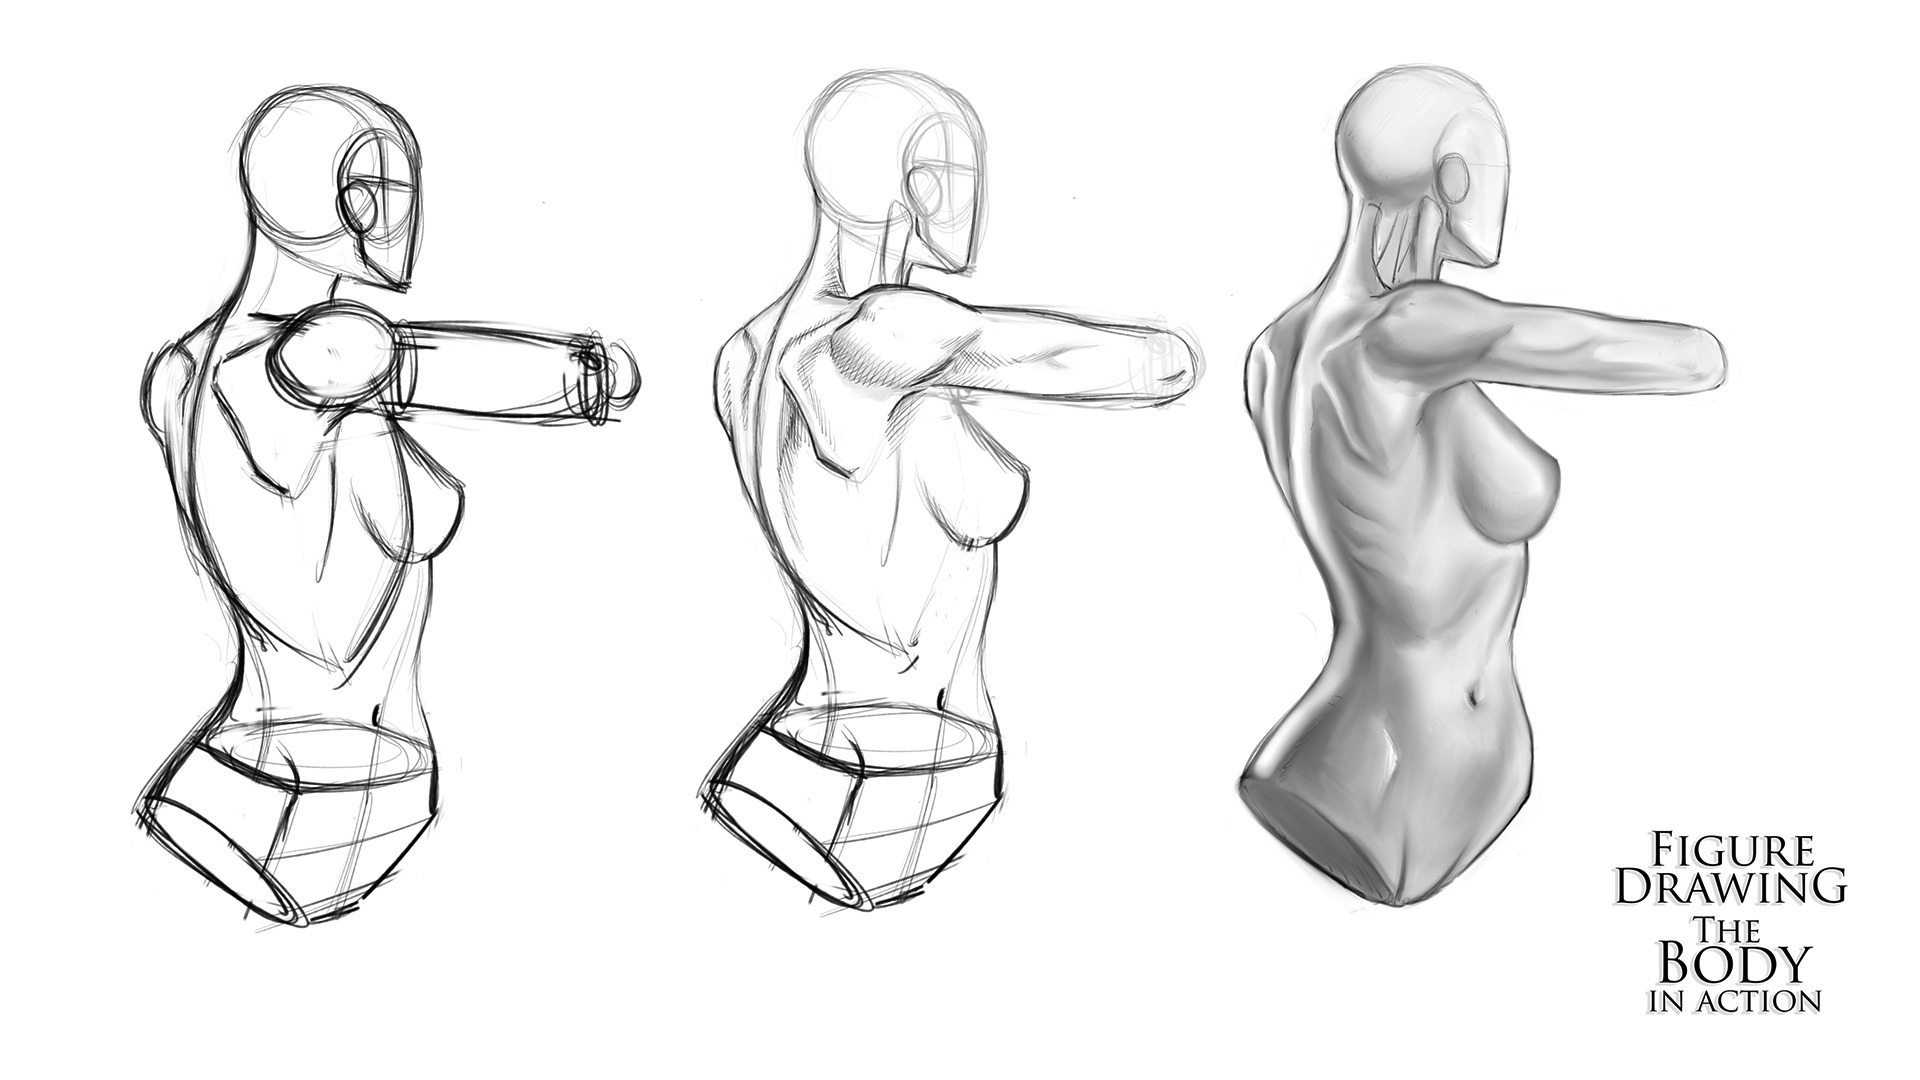
Now you might not have to learn all those fancy words that are derived from latin but it sure isn’t going to hurt! The main thing is that you do want to learn what muscles go where and how they react in certain situations as well as the bony landmarks.
Notice in the study above that this particular pose really helps us spot the spine of scapula and its relationship to the deltoid. These types of focused studies can really push your ability to understand the human figure.
Anatomy takes time to learn but it is well worth it. There is actually a lot of things that make it easier as you progress. You start to see certain patterns and rhythms in the body. For instance legs and arms have a very distinct difference from the inside ( medial ) to the outside ( lateral ).
You also begin to learn that some of the Latin names describe the forms of the anatomy. Deltoid is the shoulder muscle. The name is from Delta which we know is the fourth letter in the Greek alphabet and it is a triangle. The shoulder actually looks like an upside down triangle. See how easy that was!
Same thing with the serrates muscle. It means saw or ripped edge. Notice how they look like little teeth on the blade of a saw as they interlock with the obliques. Don’t worry, it gets easier with time and you will find your own way to memorize this stuff, I promise!
Step 5 – Draw from Life!
Draw from life as much as possible. Start with 10 minute studies then work down to 5 minute studies. Pay attention to the different choices you make. When you feel comfortable with that process, try 2 minute studies. You will really start to capture the energy of the pose.
I like drawing from my imagination as much as possible but when I start to skew the body I need to refresh my knowledge. I do some figure drawings from photos or from a site like www.quickposes.com
You can set the timer to what you want. Challenge yourself or just relax and draw at a slower speed. The main thing is that you will be thrown random poses that will help you learn the way the body moves and contorts.
You won’t get this by drawing from the mind because we tend to default to a certain way of thinking about the body. We need to draw lots of poses at different speeds to really open up our minds.
You will get a better understanding of the anatomy and how to light the human figure. You can also do the same thing with sports. I like to draw from UFC fights, boxing, kickboxing, dancing, and gymnastics.
Don’t worry, when you go back to drawing from your imagination all this hard work will help there as well!
Bonus Tip! Try Drawing the Torso with a Bean Shape First!
Here is a free sample video from my figure drawing course on drawing the torso with the bean shape method. It is a great technique for drawing the body with a more organic approach.
I hope you have found this post to be informative and if you want more instruction on figure drawing you can get my full course here – https://ram-studios-comics-art-school.teachable.com/p/figure-drawing-the-body-in-action?coupon_code=RAMWEBCODE101
All my courses come with a 30 Day Money back guarantee and lifetime access to the lessons! Use the code above to get a discount to the course.
Robert A. Marzullo
Ram Studios Comics


0 Comments