Welcome Back Fellow Artists!
Today I am going to show you 3 quick and easy ways to blend paint in the Procreate app. Let’s dive on in and get blending!
My list of Digital Art Tools for today’s post ( My Amazon Affiliate links )-
Ipad Pro 4th Generation – https://amzn.to/46DNJqG
Apple Pencil 2nd Generation – https://amzn.to/3Fc8tKA
Procreate app – https://www.procreate.com
The Procreate app has come a long ways over the years. It is one of my favorite programs to create my digital art in. It has a streamline interface and tons of features to get the job done.
The first method I want to show you for blending paint in Procreate is by using a soft airbrush. It is super simple and effective.
Setting Up the Canvas in Procreate
First create a new canvas. Go to the top right of the gallery and hit the little “+” sign to start a new canvas. I will be using a canvas at 1920px x 1080px.
You can create a canvas at any size you want really but keep in mind the bigger the canvas and the less layers you will be able to use as you create.
Now we can create our first shape to paint. Go the selection tool located at the top left. It looks like an “S” shape just left of the little arrow. When you have the selection tool active you will see a menu pop up on the bottom. Go to the very right and select “Ellipse”.
We want a perfect circle so to do this you will draw across the screen and place one finger on the canvas as you drag across with the Apple Pencil. This will convert the ellipse to a circle.
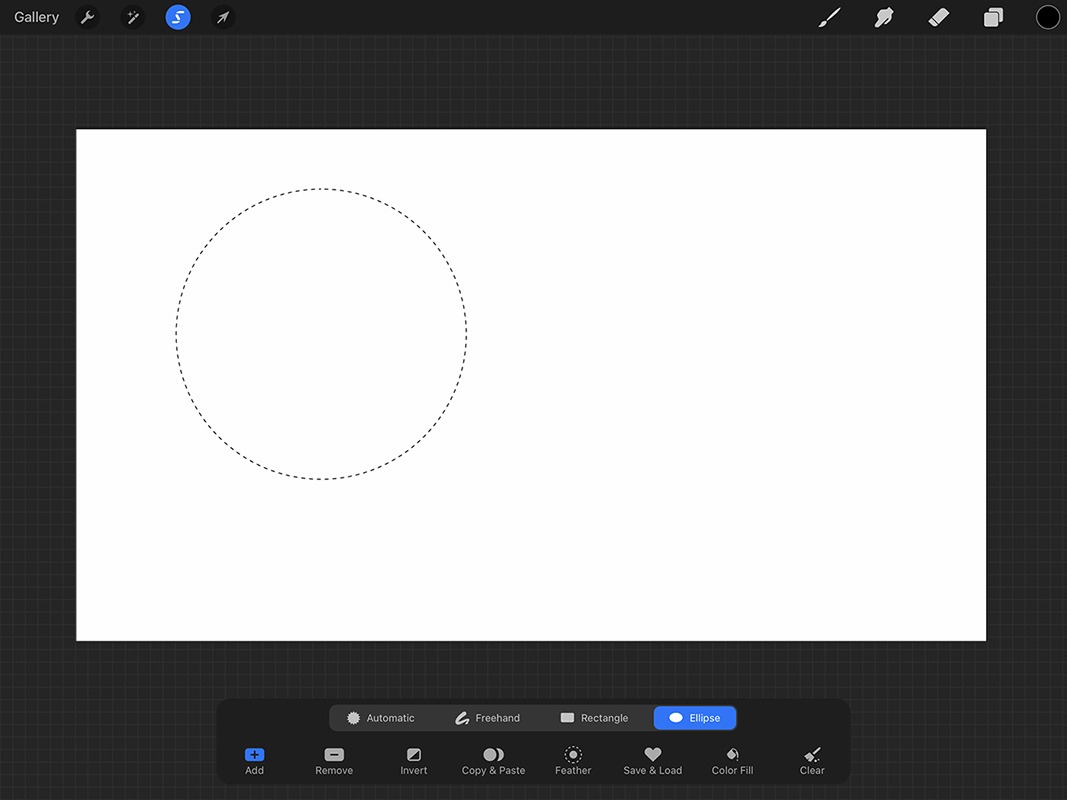
Now we can fill the circle with a color of your choice. Just click the color swatch at the top right and choose your color. I will be using a bright red to start with. Drag the color and drop it into the selection for a quick fill.
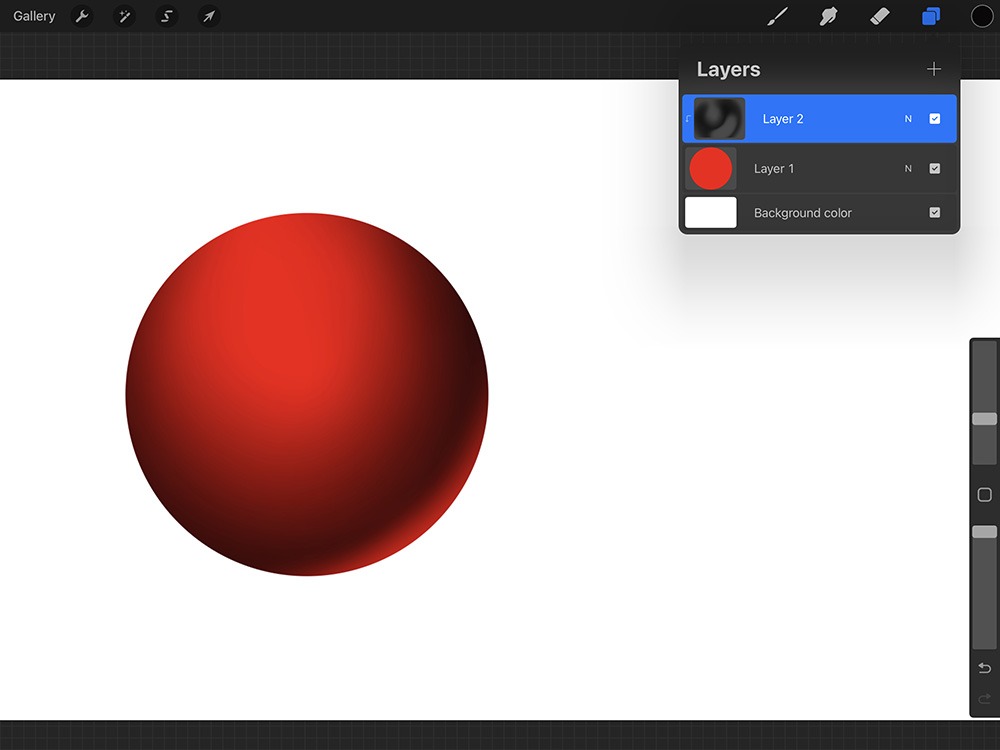
Next we will add a new layer over the top of this one. A great way to add paint on a floating layer that will only effect the previous layer is by using a “Clipping Mask.”
To do this you will tap the new layer on top and select “Clipping Mask” as highlighted in the next image.
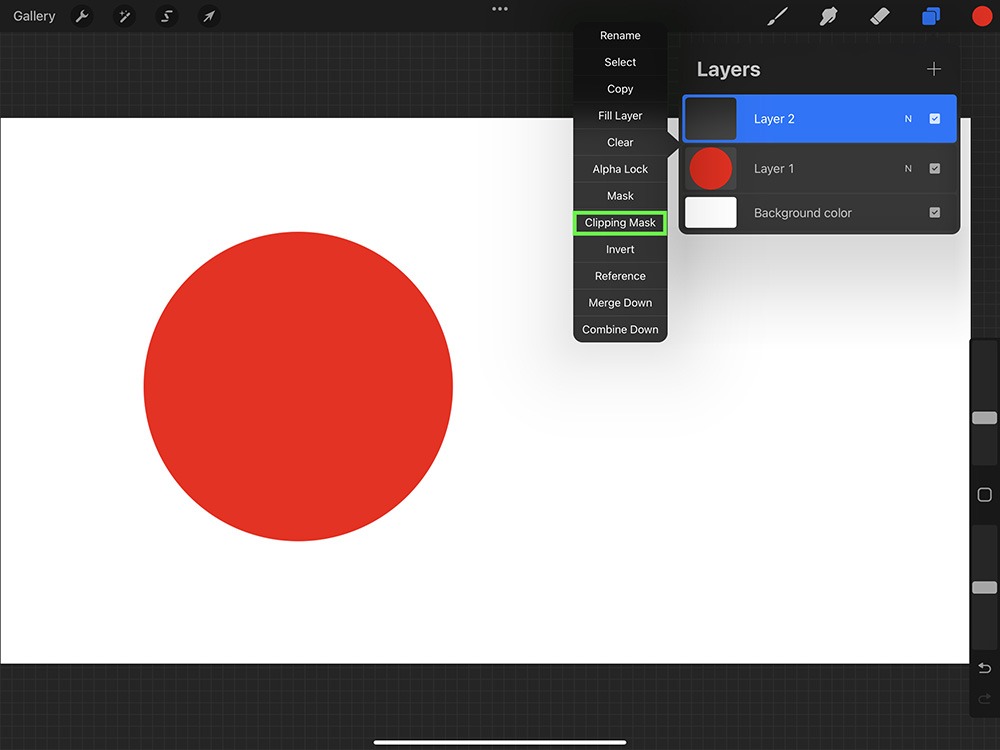
Clipping Masks are a great way to digitally paint in Procreate in a non-destructive way.
Now when we paint on the new layer it will only add paint to the red circle. This works with as many new layers as you need as long as they are stacked on top of one another. When the clipping mask is enabled you will see the layer move over slightly and see a small hooked arrow to the left of the clipped layer.
This technique is very powerful since it provides a non destructive approach to add paint to your base layer and you can also use Blending Modes for each new layer if needed.
Blending Method 1 – The Soft Airbrush
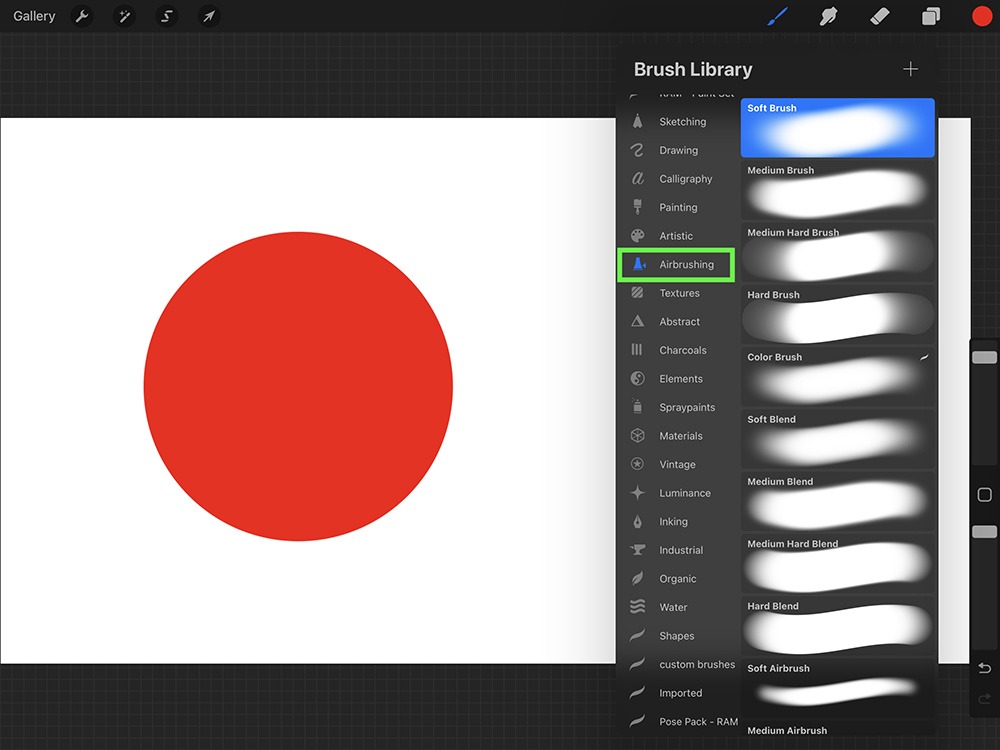
Now we are ready to start painting with a large soft airbrush. Procreate has a ton of great brushes to choose from but I want to get your rolling with the basics first.
Select the “Soft Brush” from the “Airbrush” folder in the brushes menu. See the image below for reference.
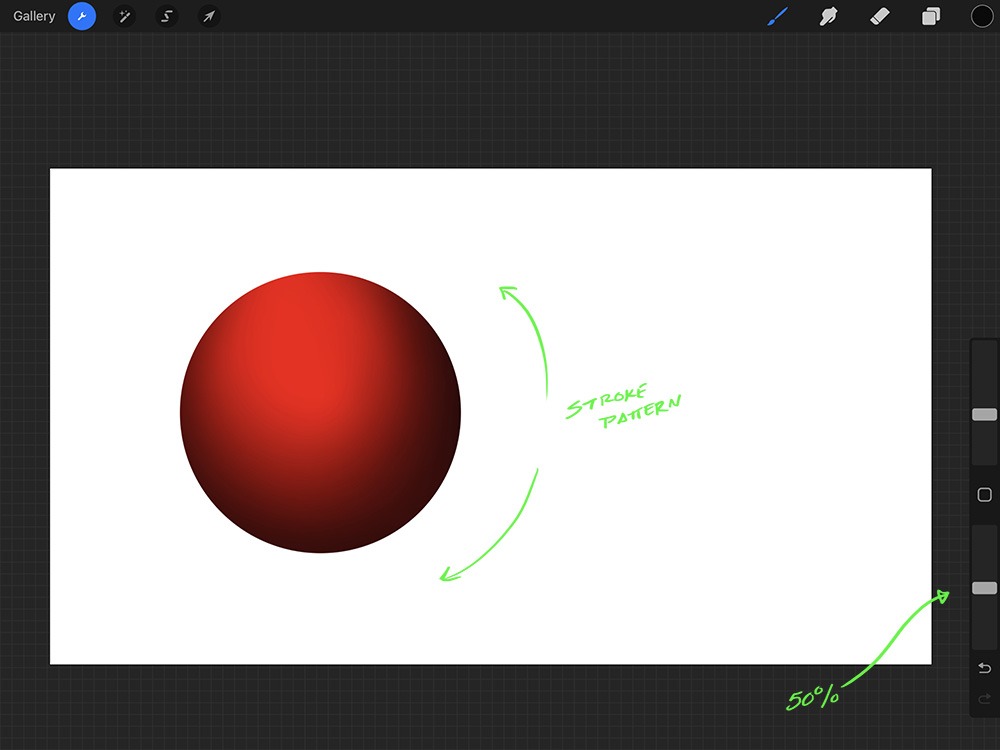
Now select a new color to start painting. I will be using a solid black. Make sure you are still on the new Clipping Mask layer and start painting around the edge of the circle. We want to round the form and turn it from a circle to a spherical shape.
I like to increase the brush size to around half of the size of the circle. This way I can blend the shape without getting smaller brush strokes. I also like to turn the opacity down to about 50% so that I can slowly add the effect without it going straight to black.
This percentage may vary for you based upon your pressure settings and/or your hand strength so you might need to experiment here a bit.
You should have something like the image below at this next step.
Another great thing about this new layer being a Clipping Mask is that we can paint and erase as much as we need to get the desired result.
Let’s erase some of the paint away on the lower bottom right of the sphere. This will give us a nice bounced light effect that you will see on spherical objects that are slightly reflective.
I will use the same “Soft Brush” for the eraser and create the effect as shown below.
This same effect could have also been achieved by painting a new color on an additional clipping mask layer. This way you can control lighting effects and color at the same time.
Blending method 2 – Using the Smudge Brush
For the next method we will use the smudge brush to blend the paint so let’s keep painting!
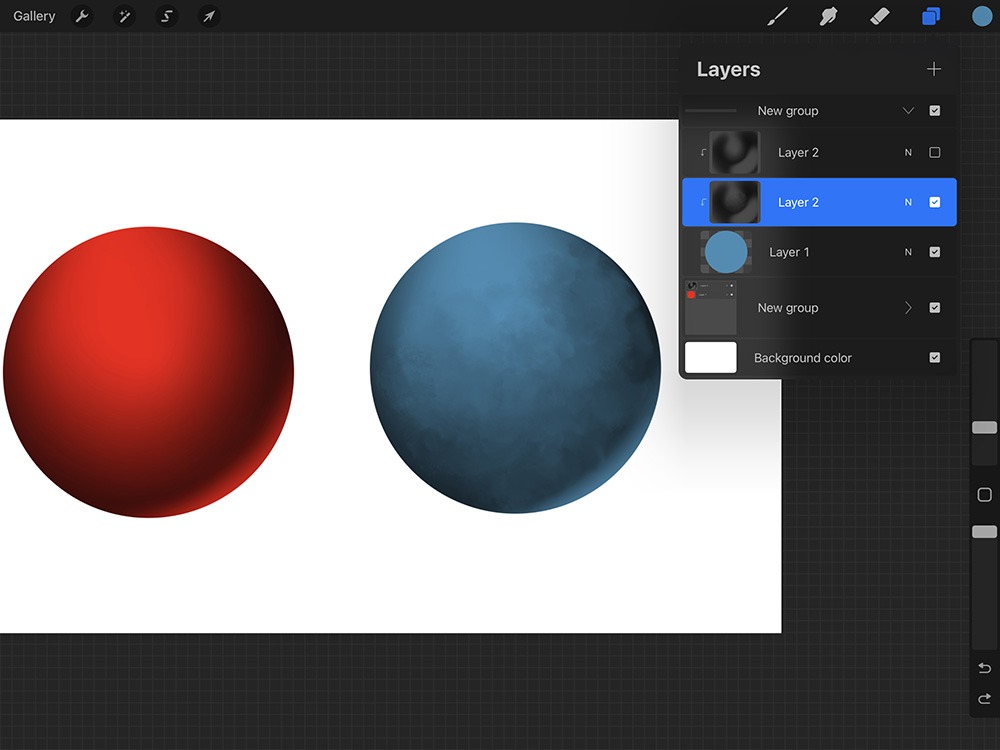
To speed things along I am going to Group these two layers together to make a copy of the sphere. To do this simply select the first layer and then swipe over on the next layer. Once both are selected you should see the word “Group” pop up on the top right. Click that and these two layers will not be in a grouped folder.
Swipe over to the left on the grouped folder and hit “Duplicate.” Now select the new folder and move it over to the right.
Just to make things a little more interesting lets change the color of the new sphere. This is pretty easy to do. Simple swipe over with two fingers to the right on the new sphere layer to enable the “Alpha Lock.” This will allow us to paint on the layer without going over the edges.
This feature combined with Clipping Masks gives us a lot of ways to edit our work and not get stuck. Now select a new color and drag it to the red circle. I will use a lighter blue for this but you can pick whatever you like.
We will use the existing clipping mask layer with the fade already applied. No sense in wasting it!
Another thing we can do when we start to experiment with things like this is to copy the clipping mask layer and turn the visibility off of the copy. Do that by swiping over to the left on the layer with the fade and tapping “Duplicate.”
Now select the smudge brush on the top right. It is directly to the right of the brush icon and looks like a hand with the fingers pointing down.
You can play around with all sorts of brushes for this part but I will be using a brush that comes with Procreate. It is under the Painting folder and is called “Salamanca”. You can see it here.
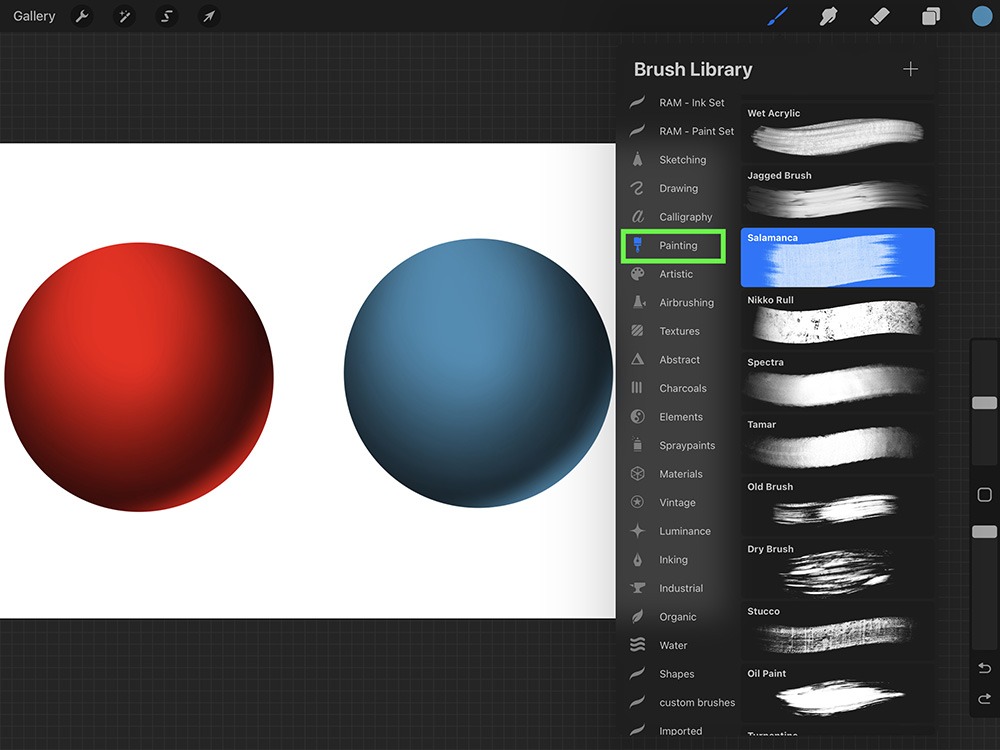
The nice thing about this type of brush is that it will allow us to move the paint around and give us some well needed texture at the same time.
So now I will take the smudge brush and move the black shadows layer paint around a bit. Notice that when you push the paint from the shadow side it will appear darker. You can also start form the lighter side and push the paint back in the other direction.
Like any other brush you can play around with the opacity slider and control the intensity in which it moves the paint. You can also do a two finger tap on the layer and control the opacity to pull back on the effect as well.
Blending Method 3 – Overlapping Strokes
For this next way of blending we will copy the red sphere yet again. Go back to the first group and swipe over to the left and hit “Duplicate.”
You can move the groups around and place them wherever you want to give yourself room to work.
Just make sure that when your selection tool is active that you toggle it on “Uniform” so that when you grab the corners of the object it doesn’t distort unless you like that sort of thing!
Now lets take the red circle and change the base color one more time. Remember to make sure that the “Alpha Lock” is on and then drag and drop your desired color. I will pick a bright green to work with.
For this one I want to introduce another color. I will add a new layer and set it to “Clipping Mask” on top of the black fade that should already be in the group if you have been following along properly.
Just select a brush of your choice ( I am using the basic “Round Brush” ) and apply the new color. Since I will be using a brighter yellow I will add it to the light source side like the image below.
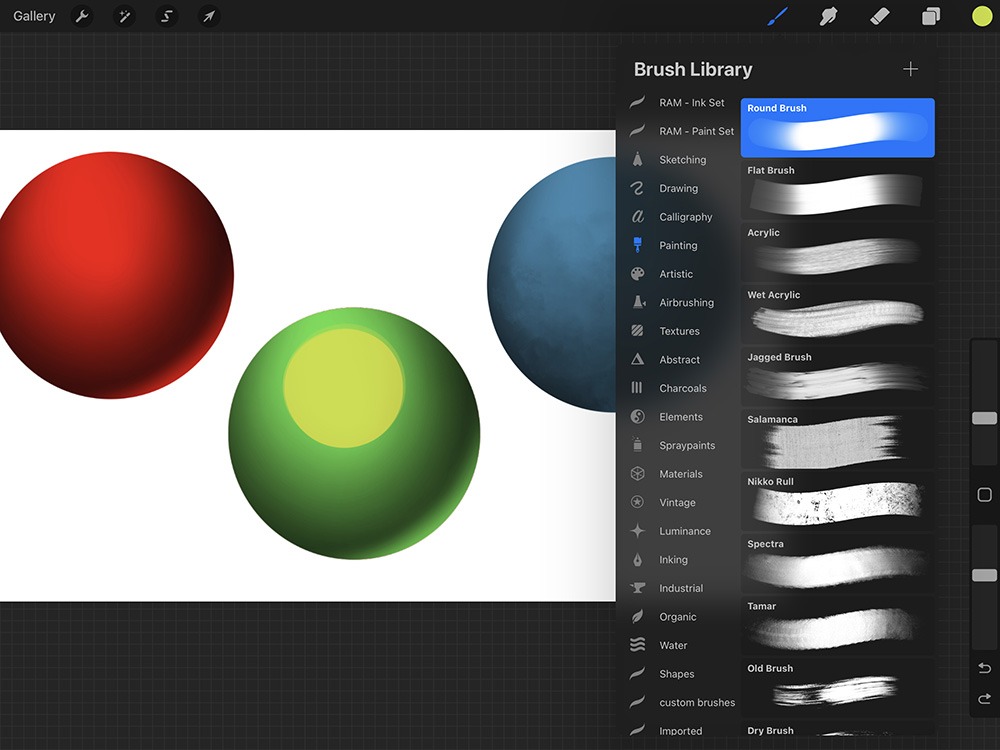
You can see that this big blob of yellow isn’t what we are after. We now have to blend it. We can do this by holding our finger on the color next to the edge that we are trying to blend.
I like to use a brush that is big enough to easily pass on both sides of whatever I am trying to blend. This brush size will vary depending upon exactly where I am at in the painting process.
The other tricky thing about this is that we have to keep holding our finger on each new point of selection to continue to refine the paint work. This would be best explained with a video –
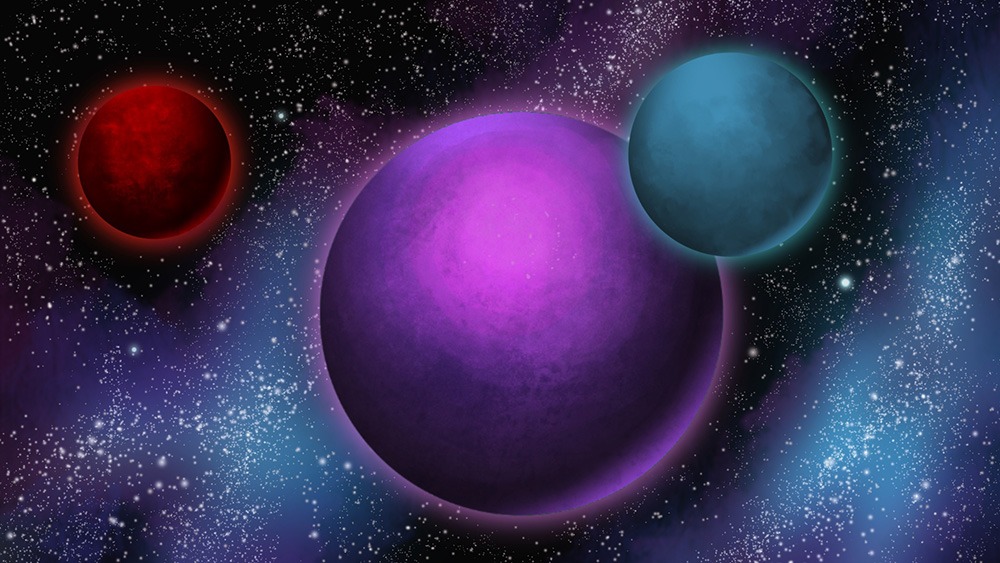
Here is what I ended up with after adding some more effects to the illustration. I love painting space scenes with these basic techniques and a few different brushes.
I hope today’s digital painting tutorial has been informative. I am creating new tutorials to help beginners get better at digital painting so please check back for more.
You can also sign up for my newsletter and get informed of new blog posts and other digital products that I create. You can opt in on the home page of this site.
If you want to learn more about digital painting you can view my Procreate course here. I will be updating this soon and adding more content. Feel free to reach out and let me know what questions you have and I will do my best to help out directly or create new content that answers your questions.
View this course here – Click here
Thanks for reading today and good luck with your digital art!
-Robert
0 Comments