Welcome back fellow artists!
In today’s tutorial I want to share some techniques on simplifying and drawing the torso of the body. This area can be tricky but hopefully by the end of these lessons you will be on your way to drawing the torso or trunk of the body like a pro!
Step 1 – Understanding the Spine
Let’s first start with the spine. I know it’s a bit confusing to look at and even harder to draw but luckily we will be simplifying it for this exercise.
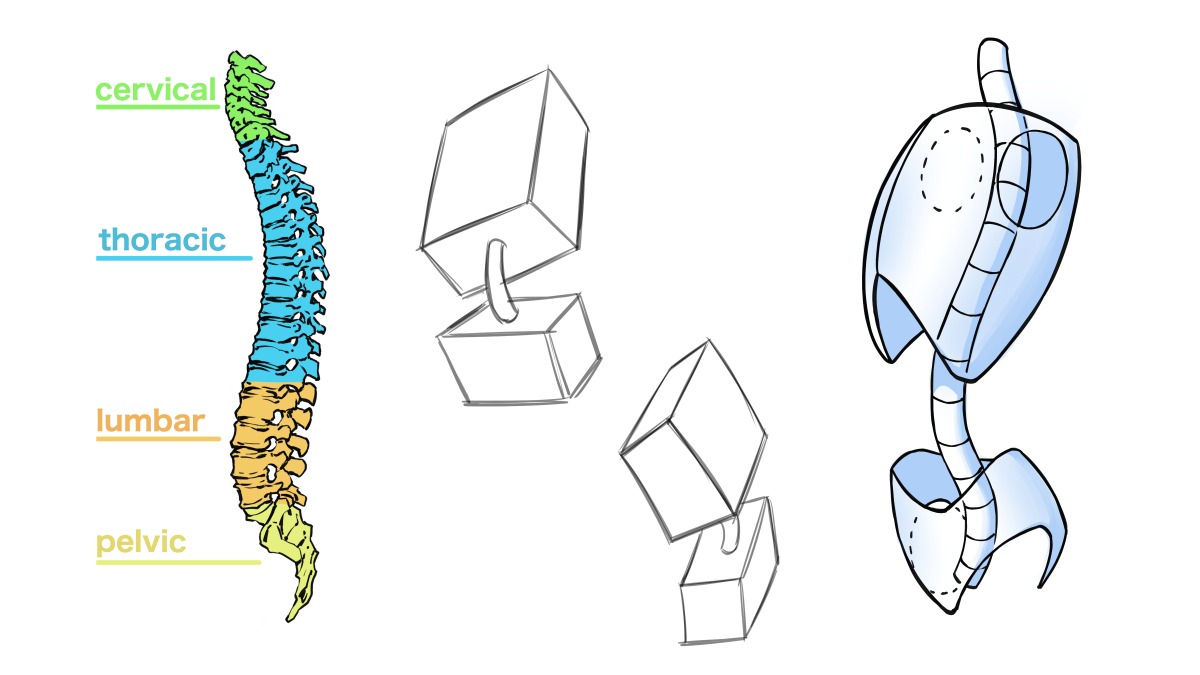
Take the time to gain a basic understanding of the regions of the spine. Notice that the Thoracic bends towards the upper back and the Lumbar and Cervical areas bends toward the front of the body.
This can be very helpful when drawing the torso in a way that looks natural and organic. Notice in the illustration that we will be drawing the spine as a long cylindrical tube. We don’t need to draw all those individual vertebrae to draw the torso.
Sometimes less is more!
Step 2 – Drawing the Torso with Primitives
in this next step we will draw the upper and lower torso with very basic representations. This allows us to focus on the different angles of the upper torso to the pelvis.
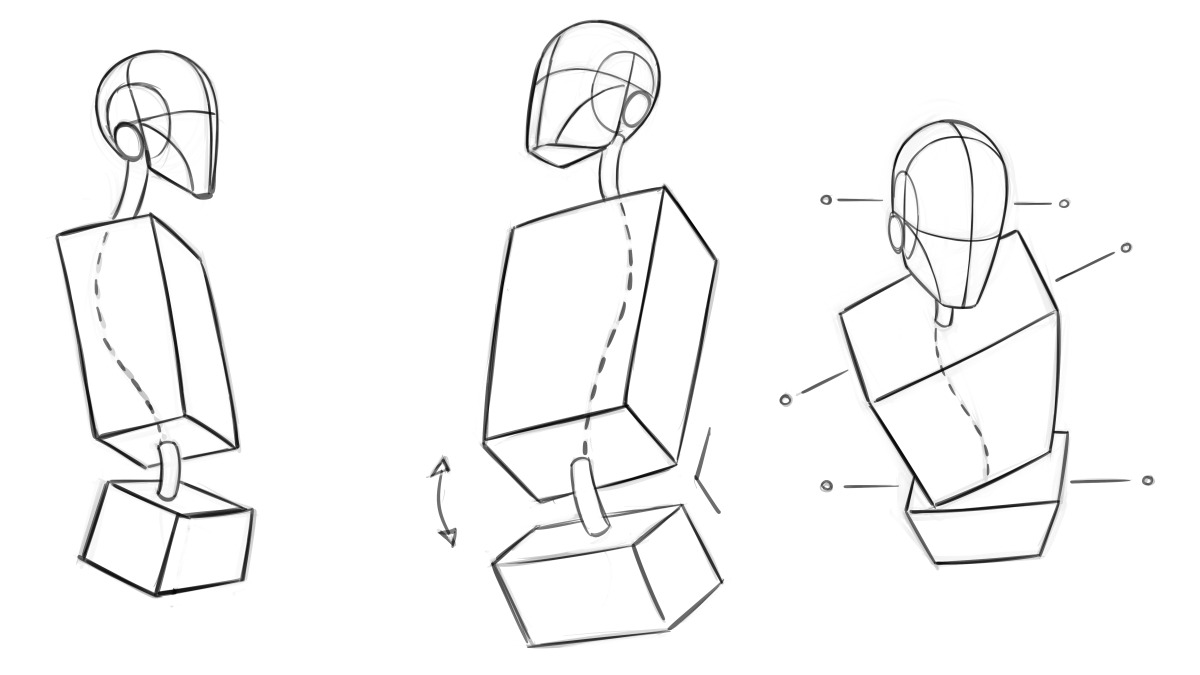
These primitive forms also make it much easier to draw the body with a sense of perspective in mind.
Try drawing a variety of these poses and make sure to twist the 3 main masses ( head, upper torso, pelvis ) so that they are facing in various orientations from one another. This adds to the dynamic feeling of the pose.
Step 3 – Drawing the Organic Base Forms
For the next step we will make the torso look a touch more organic. These will still be more simplified than the end result but this will allow you to systematically make the progress you need.
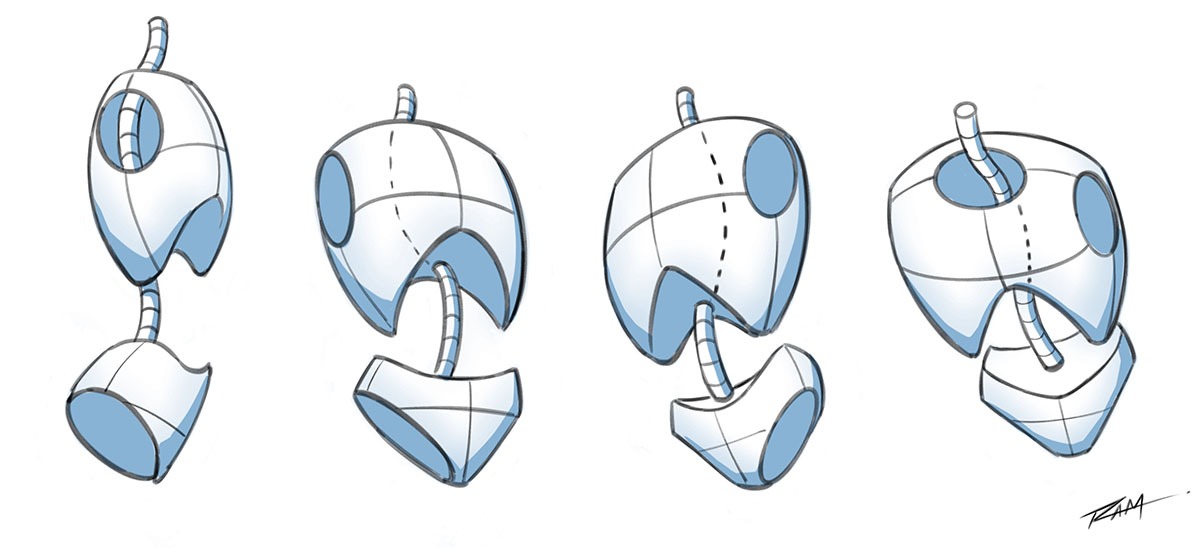
You can make these shapes look how you want but I like to use a barrel shape for the chest and floating underwear for the pelvis. Credit where credit is due, I learned this method from the great Jim Lee in one of his amazing Youtube tutorials.
Just picture an action figure with the head, arms, and legs ripped off. My apologies if that sounds a bit gruesome but it does totally look like it!
Again, do your best to imagine the spine flowing through the forms. Try to twist and contort the body to make more interesting poses.
Quick Tip – Venture past drawing the illustrations that I have supplied. Find poses in life or comics that you admire and break them down in these similar methods. You will start to learn how the body moves and how to recreate it for your own illustrations.
Step 4 – Drawing the Simplified Anatomy
In this next step we will draw simple representations of the anatomy. I like to use big clean shapes here. Not only is it quicker to draw this way, it also makes it much easier to draw the body in variety of perspectives.
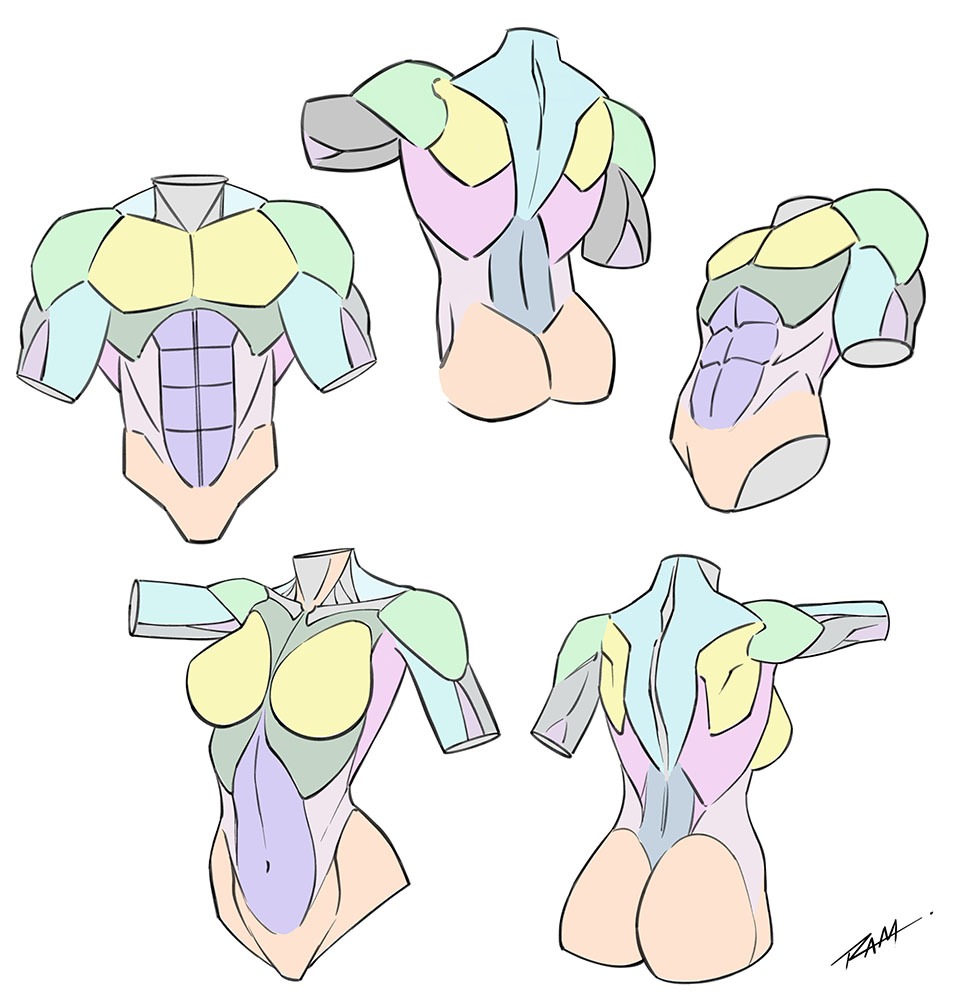
Keep in mind that this is just the way I like to simplify the anatomy of the torso. You may find other shapes that relate better to your particular style.
There is not a right or wrong way to do this. Even anatomy can be subjective. Look at other artists and notice how they make different distinctions to the work.
Also, notice when studying from life that there are major proportional difference with people and their muscle definition. Some people have larger shoulders or more defined backs, etc. The same can be true for your illustrations.
Here is a video on my Youtube channel on drawing the male torso with simplified anatomy –
Step 5 – Rendering the Anatomy
In this step you can take what you have learned and refine it a bit and round out the forms. You can do this with tonal value or cross hatching. I like to also break up the line work a bit more to make the anatomy look more organic.
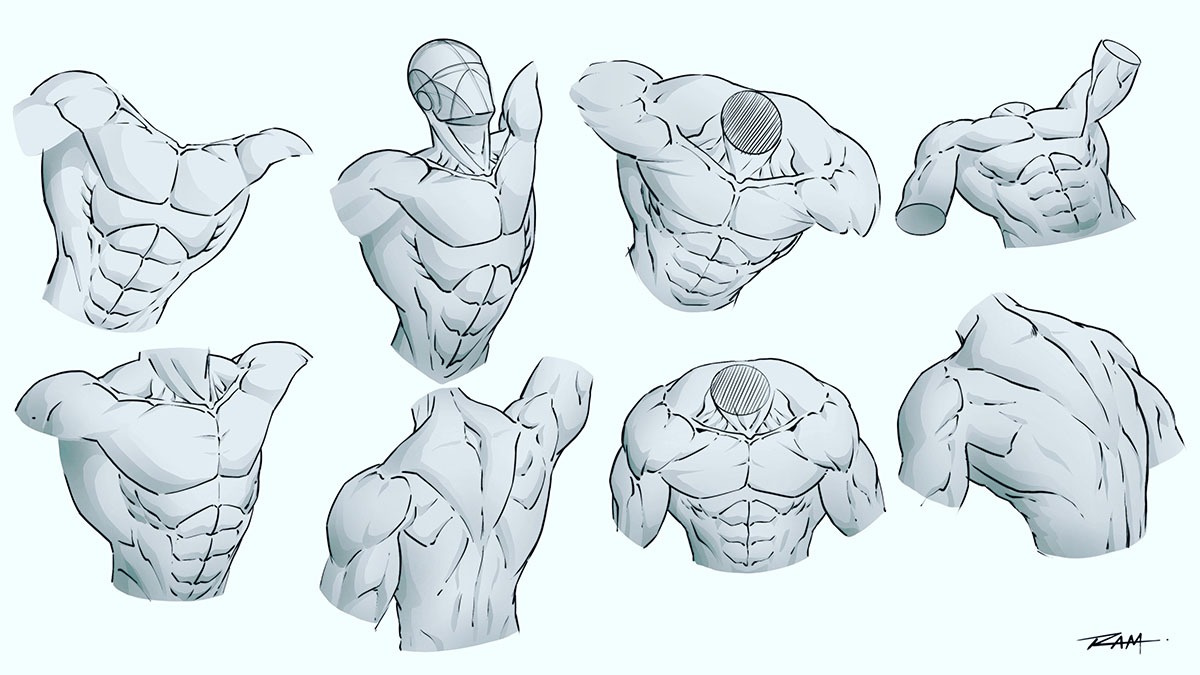
Try to think of the anatomy or each muscle group as fading in and out of the area it resides in. This way you don’t trace each muscle for the final illustration. That serves a purpose for the simplified studies but not for the end result.
Quick Tip – Try drawing the torso by first starting with a bean shape. It’s an amazingly simple yet effective way to draw the torso organically.
Here is a video showing you how to use this method –
There you have it! Those are my main techniques for drawing the male and female torsos for my characters. I hope you found today’s tutorial to be helpful and please share it with your fellow artists if you don’t mind.
Want to Learn More? Check out my course – “Figure Drawing – The Body in Action” – Click here.
Remember, be patient with yourself and keep drawing every day. You got this! 😉
Sincerely,
Robert A. Marzullo
Ram Studios Comics


7 Comments
Rosa · May 26, 2022 at 5:01 pm
Keep Shining Rob!
RAM · June 2, 2022 at 7:39 pm
Thanks Ma! 🙂
LYLE WYANT · May 26, 2022 at 5:40 pm
From the male torso video, I can visualize drawing Iron Man and Batman which are two of my favorite characters. Thanks for the help.
RAM · June 2, 2022 at 7:40 pm
Happy to hear that it helped Lyle! More on the way soon! 🙂
Reuby · May 28, 2022 at 9:26 am
Thanks for this Robert, I have just started to study the torso and you couldn’t have posted this at a better time!
RAM · June 2, 2022 at 7:41 pm
My pleasure Reuby and glad you found it to be useful. More on the way soon! 😉
soni · January 16, 2024 at 4:54 pm
Thank you for your help. I tend to just draw the figure without foundation. I struggle working from inside out. I understand now why I am not able to draw a figure from my imagination.