Hello Fellow Artists!
I hope you are having a great day wherever you are. I will assume you are doing pretty good since you are searching for ways to improve your art skills. That is always a good way to lift my spirits!
Today I want to show you some of the techniques that I use to render and shade my comic art on a daily basic. You will learn some of the basic concepts as well as work along with some step by steps to apply the knowledge.
What is cross hatching and why do we need it anyways?
Okay, maybe that is a bit too basic but let’s discuss it anyways.
Cross hatching is a way to round out the forms and/or apply texture to our illustrations.
You don’t actually have to have it but most styles tend to look much better with it. Generally if the artwork doesn’t use cross hatching or color of some kind it can look a bit flat.
Think of cross hatching or rendering as a grayscale or gradient that softens up the hard edges and forms to create more depth within the scene or subject.
A good way to start is to establish a single value by drawing lines parallel to one another. Try making some marks like these.
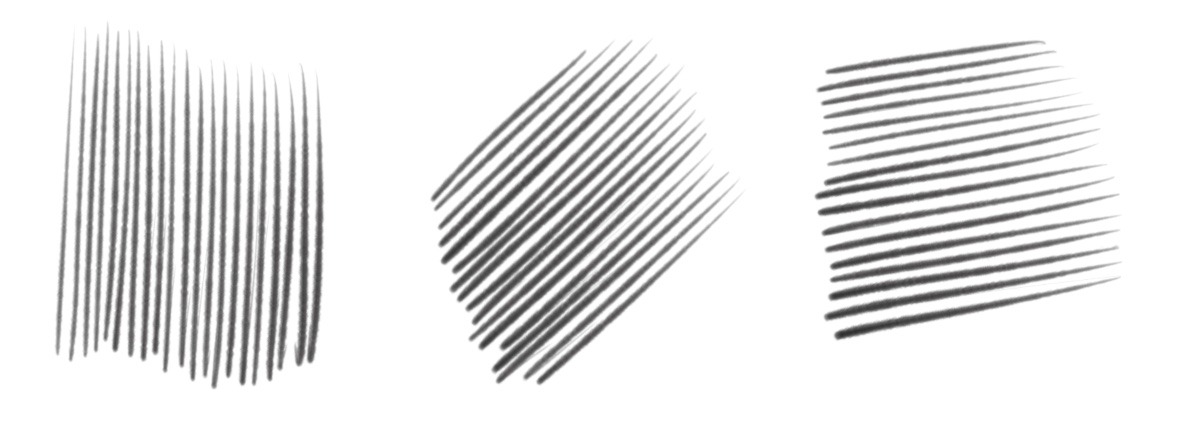
Practice drawing them at different angles to find your comfort zone. I tend to draw more consistent lines with a downward pull.
I also can only draw consistent lines over a small distance. These examples were only about 1.5” in length. The longer the lines get the more “wobbly” they get.
Keep in mind that these lines don’t need to be so parallel or consistent. It takes lots of practice to get clean lines but don’t let a perfection mindset slow you down.
Just work with the lines you can create today and keep moving forward. Besides, some wavy lines here and there are not a deal breaker.
I have spent a lot of time trying to perfect my lines and make things look clean. That can take away from the energy of the illustration real quick so be careful not to fall into that trap!
it’s really about balance and timing. There are times you will want energetic lines and times you want clean consistent lines.
Now let’s practice some cross hatching just like the pros do! Try adding some lines at a 30 to 45 degree angle. You can also try adding a 3rd set also at a slightly different angle.

You can see that with each new row of lines you get a darker value. This is the basic concept but things get a bit harder when illustrating complex scenes.
Let’s work on a background element and add some light and shadow to it. I like to practice pieces like this to build an understanding of a particular subject matter.
Follow along with these steps below and draw a chimney. You can click on any of the images within this tutorial to enlarge them.
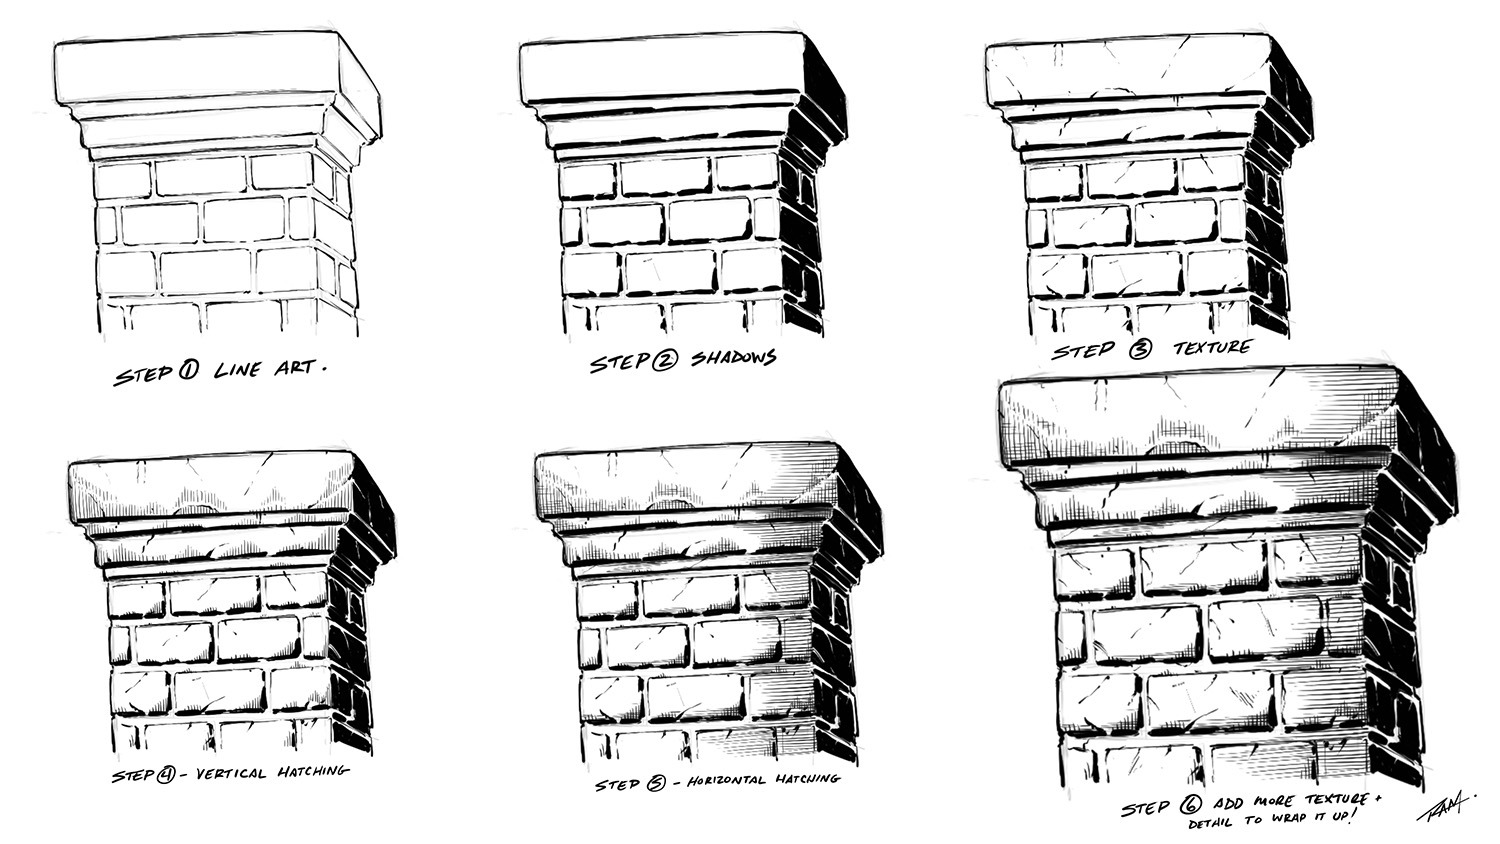
Do you see how in the chimney example that the imperfections give it character? We could have been a lot more structured and used a ruler to draw this but it would have made the art feel more tense and rigid.
Practice breaking down various things you like to draw in this way and play around with the rendering styles a bit. It’s okay to be messy once and a while so that you can express more range in your illustrations.
More Rendering to Practice

For this next drawing I wanted to give you some more things to practice. Try playing around with the cross hatching and stipple shading samples on the left of the tree.
It’s a good idea to fill up pages with these types of renderings so that you can get your muscle memory down.
Some things to try when varying up your rendering is line length, line taper, line spacing, different overlapping angles, and clean vs. messy. For the stipple shading try thicker marks that thin out as they reach the light.
For the 3 spheres on the right of the tree I am trying to show you how you might move the light source around the object. Notice that these are basic lines with very little character but we can still convey light and shadow easily enough.
The tree in the middle is to show you how you can be messy and sporadic with your rendering and still create something recognizable and organic. I have also included a video demonstrating this illustration for you to watch here –
Rendering Arm Anatomy
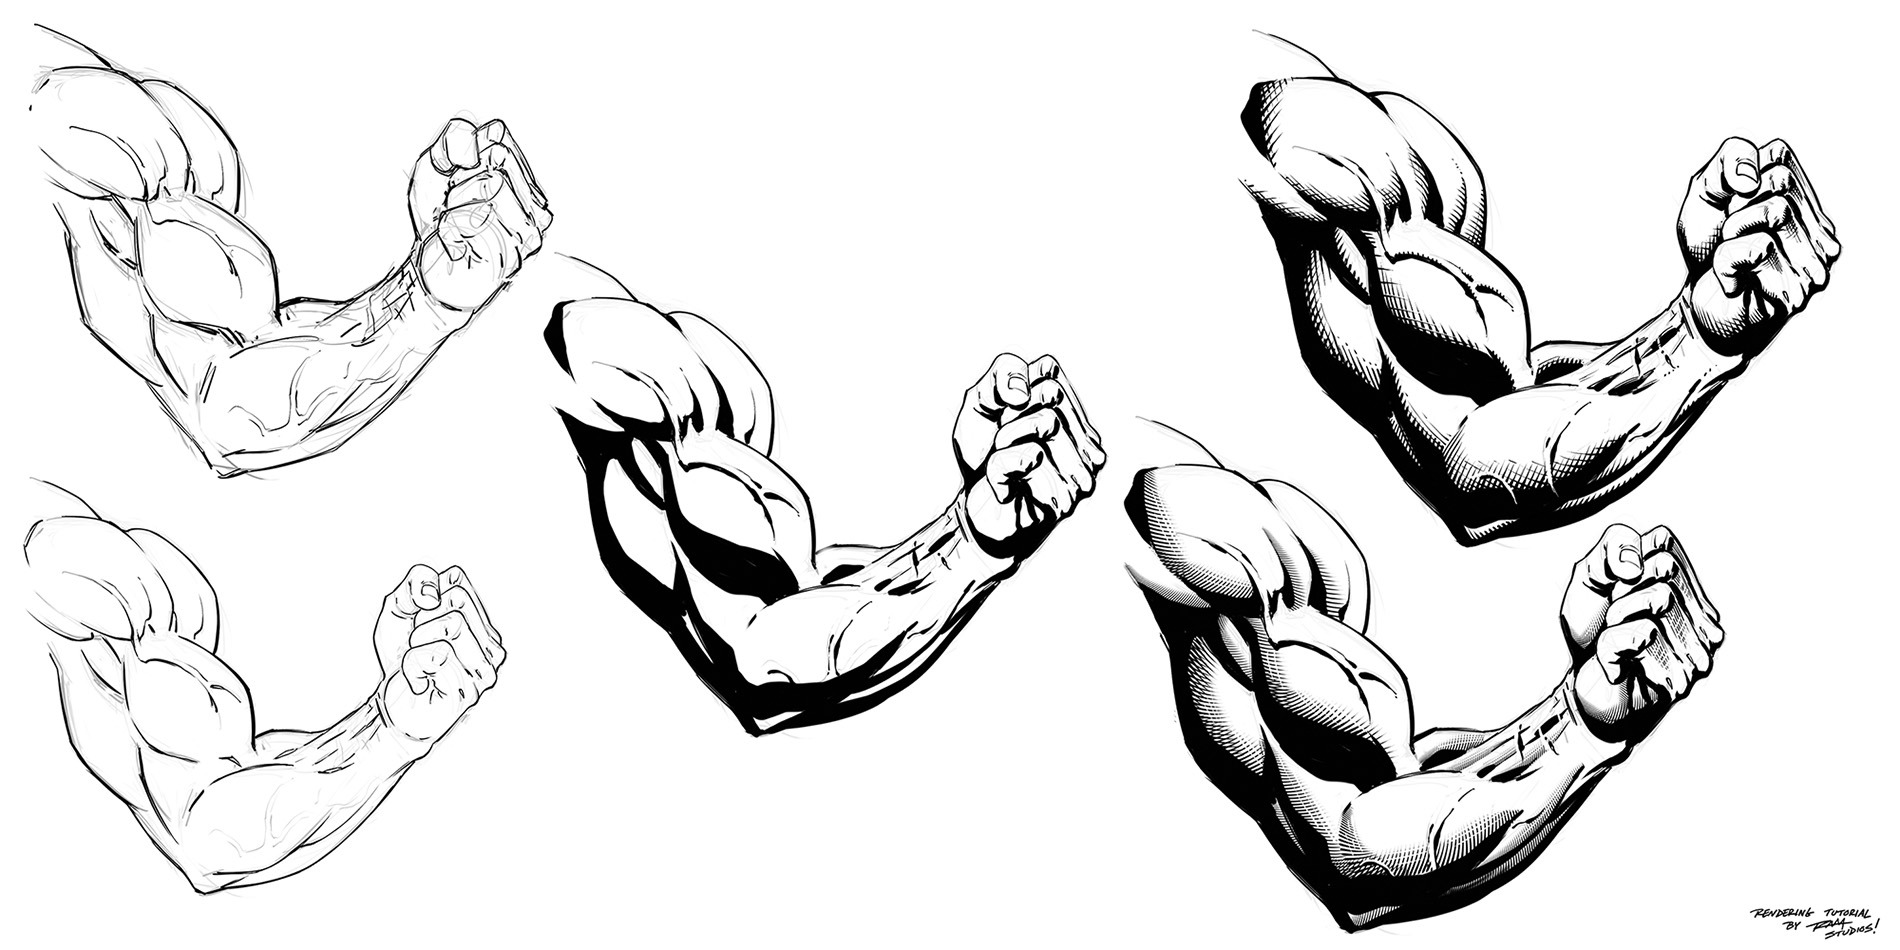
For our next example I wanted to show you how to apply some crosshatching to arm anatomy. Well, at least my way of doing it!
I like to first establish the line art then apply the shapes of shadows. From there I can render from the shadows towards the light.
The same rules apply as mentioned above. Thin out the lines or the density of the cross hatching as they reach the light. Try to think of the muscles groups as spherical or cylindrical objects but watch out for creating anatomy that looks overly segmented.
Notice that I included two versions of the arm in the cross hatching stage. I did one free hand and the other I used crosshatching brushes that I made for Procreate.
I wanted to share you how the two looked by comparison. Study a variety of ways that you can render and remember that paying attention to other artists will help you learn faster.
I hope you’ve enjoyed this art tutorial and more lessons are on the way so please join my newsletter for updates as I create more.
Thank you for stopping by and good luck with your art!
Robert A. Marzullo
Ram Studios Comics
If you would like to learn more about comic style rendering. I have a full course here that you might find interesting – click here to view
Check out my digital brushes and other assets for artists here on my Gumroad – https://www.Gumroad.com/robertmarzullo

4 Comments
Jorge Cabral · February 12, 2023 at 8:52 pm
Thank you once again for sharing amazing content like this. I have purchased a number of your stuff on Gumroad. Truly can’t thank you enough.
RAM · April 27, 2023 at 3:35 pm
You’re welcome Jorge and thank you as well!
NiftyRosa1 · February 14, 2023 at 4:49 am
Awesome work!
RAM · April 27, 2023 at 3:34 pm
Thank you!! 🙂