Drawing characters that have a variety of expressions is essential to telling a good story. Nothing worse that everyone running around mad and scared all the time.
It’s the subtleties that make a character come to life. That sinister smirk or that rolling of the eyes when someone does something ridiculous.
Having a range of emotions for your characters makes the story much more fulfilling. Just look at how Disney movies are made. They take full advantage of every expression and emotion that they can because they know it will pull the audience in to the story.
Emotions can be expressed though the simplest of drawings!
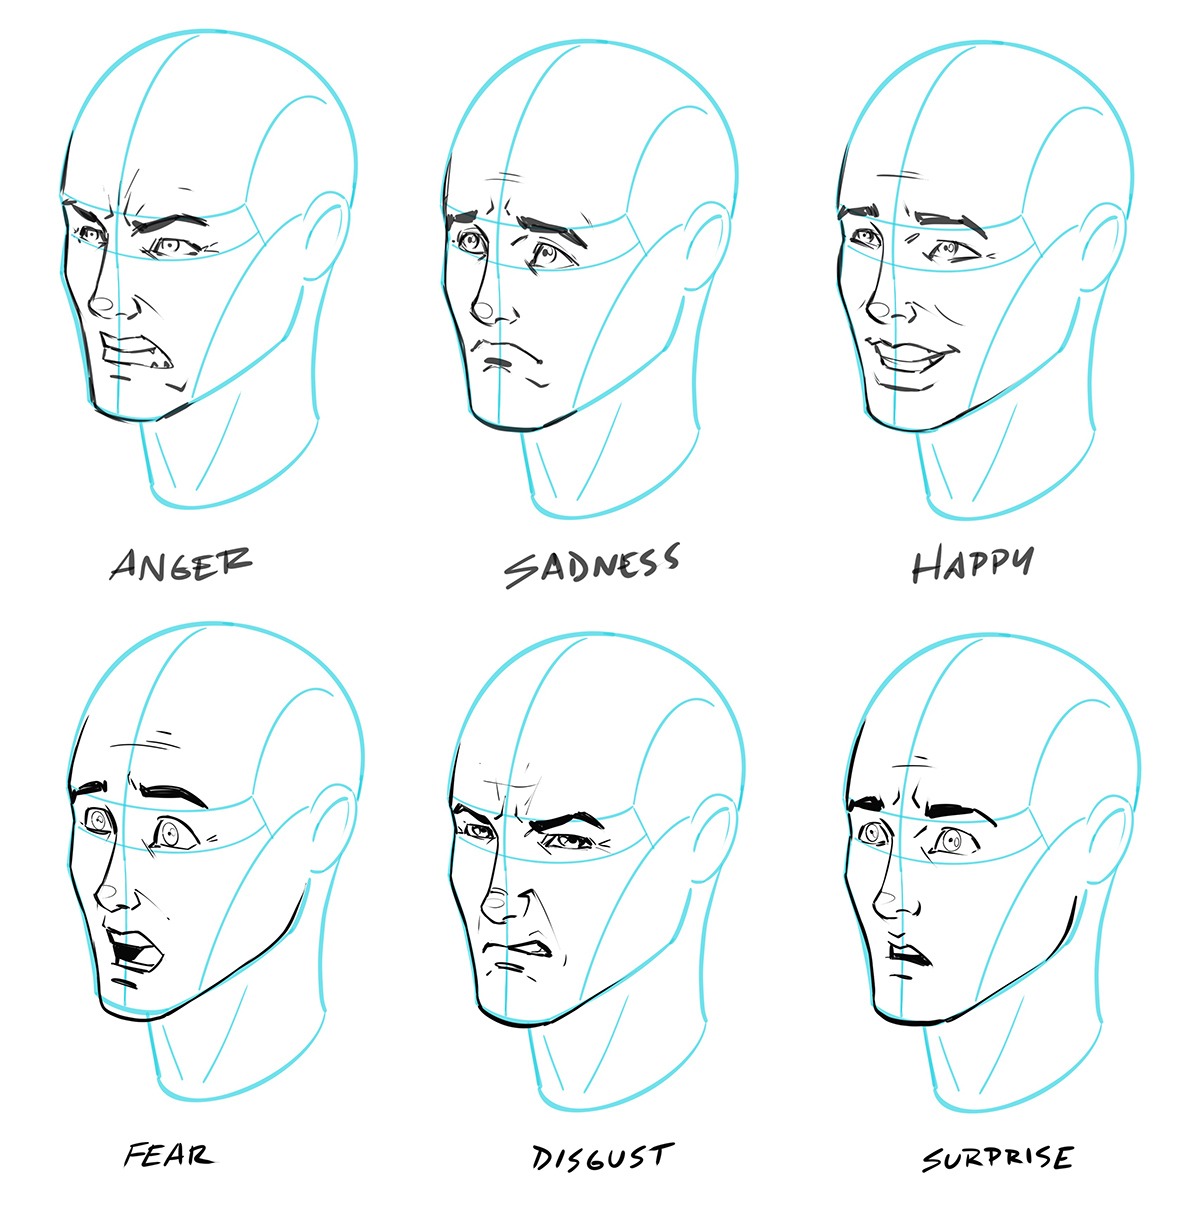
There are lots of variations of the emotions and expressions that we can create but the 6 primary ones are anger, sadness, fear, surprise, happiness, and disgust.
Then from there we tend to blend them together to create mixed emotions and subtle expressions of each.
Notice how fear and surprise are very similar to one another. Both are a response to new information and can each trigger the fight or flight response. So the facial expression is wide open eyes to either process the oncoming danger or show excitement to the news at hand.
Let’s combine a few of these can see what we can come up with!
We can start with my one of my personal favorites, The Crazy Look! You can’t have characters like the Joker without this one.
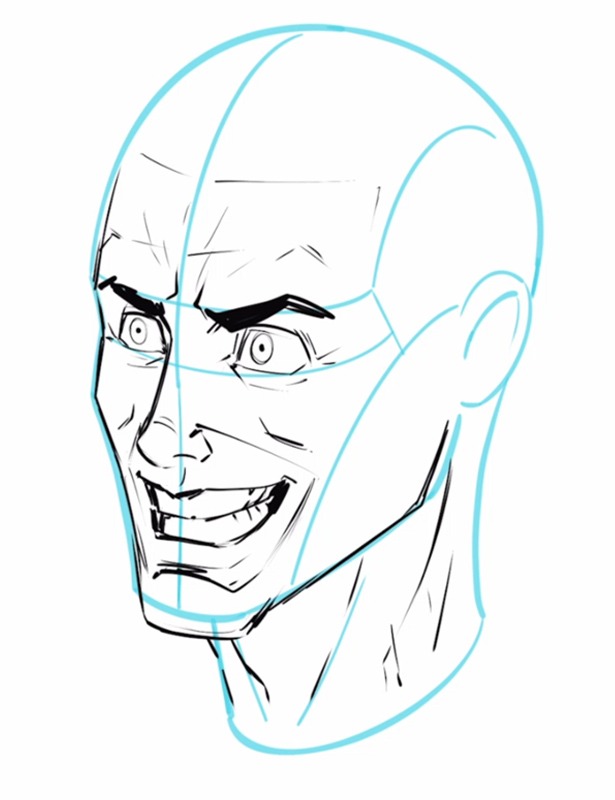
Step 1 – Drawing the Eyes
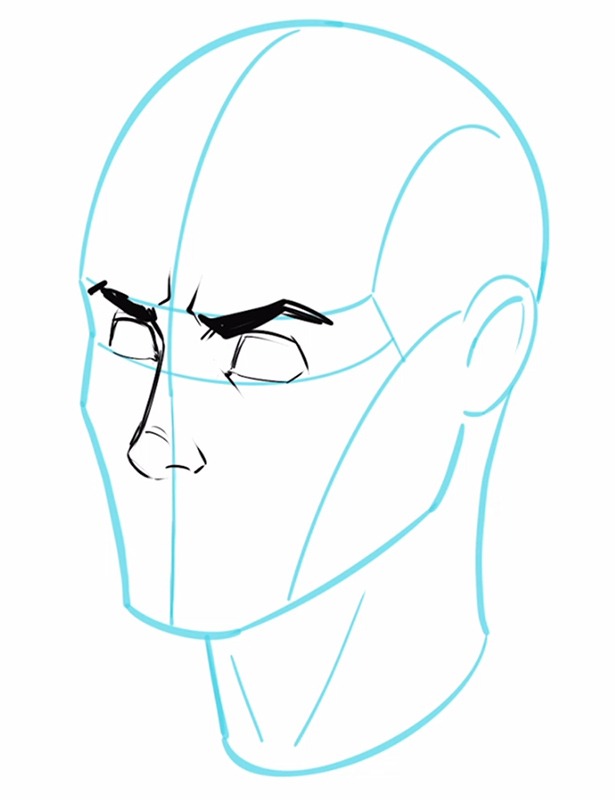
For a crazy looking expression we need to combine an excited look with a bit of anger. For really crazy characters you can even mix in some happiness.
Just picture someone laughing while they have a mad look in their eyes. Yeah, super creepy and great for those villainous characters we like to draw!
So for this step draw big open eyes with downward sloping eyes brows. This allows us to combine excitement or fear along with anger as you will soon see.
Step 2 – Adding a Big Smile
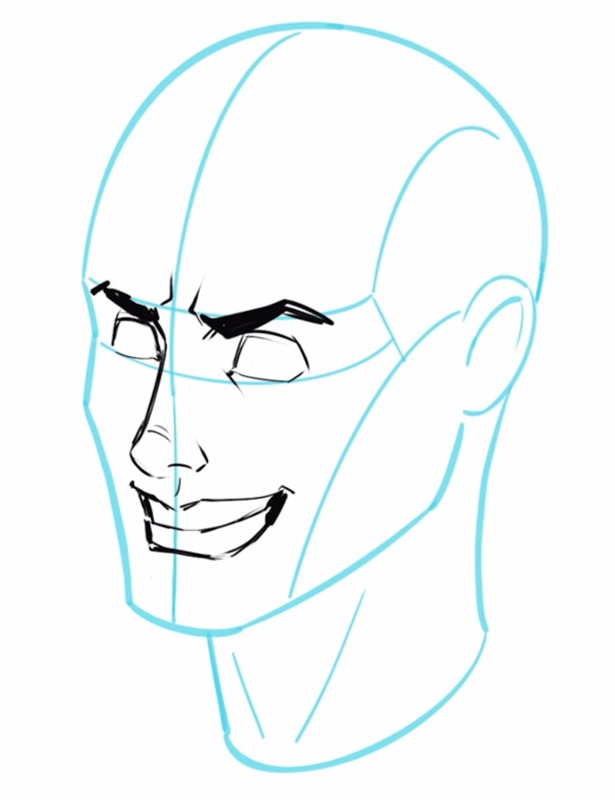
Nothing says crazy like a big smile with clenched teeth. Opinions may vary on that one of course.
The thing I like to do is here is exaggerate the size of the smile and show as much of the teeth as possible, both on the top and bottoms.
We generally smile with either the top or bottom more predominately, that is why showing both either looks crazy or a bit silly.
For an added creepiness you can show lots of gums. Ever see the movie Aliens?
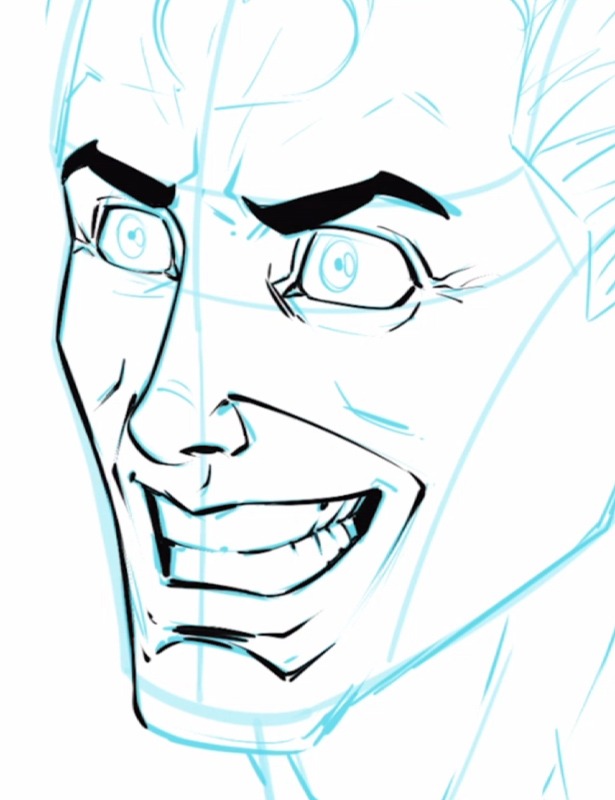
Step 3 – Eyes are Windows to the Soul
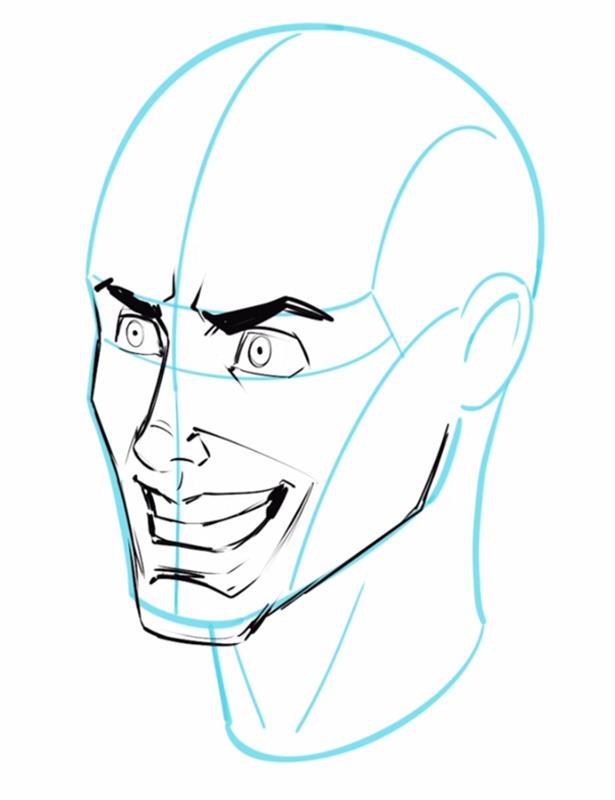
Make sure to draw the eyes with a bit of white on the top and bottom. This also helps to illustrate a crazy or fearful expression.
Draw in the shape of the jawline and some wrinkles that match the facial expression. Wrinkles around the smile connecting to the nose help it to read a bit better.
Quick Tip – Make sure to draw the iris as an oval on an angle like this.
Step 4 – Adding in Some Details
Now add in some more wrinkles and detail the face. You usually want to be careful at this stage since randomly drawing lines can age the character.
For crazy or villainous characters, I generally add more wrinkles. I think it adds to their character. So go ahead and have fun with it!
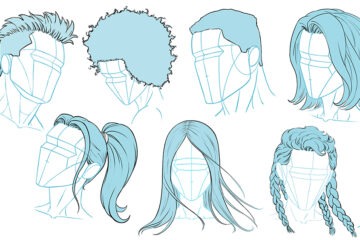
Step 5 – Crazy Hair Day
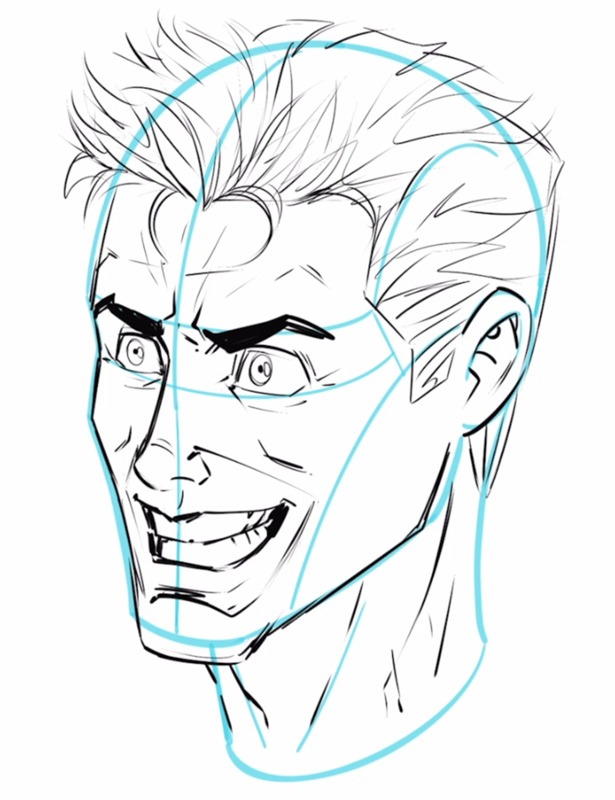
Most people will say that hair doesn’t have anything to do with expressions but I beg to differ. There is a reason they have crazy hair day at school.
You can get a lot of expressiveness out of a particular hair style so why not take advantage of it?
So here we draw lots of spikes and overlapping jagged shapes with a few curves at the end.
Step 6 – Inking the Lines
Now we can clean up the work by adding some good old digital inks!
In Procreate I add a new layer over my sketched lines, fill it with a light blue or any other color that I want, then covert the blending mode to “Screen”.
Then I add a new layer to ink on. I use a modified version of the “Tech Pen.” You can get my free Procreate brushes here If you like – https://robertmarzullo.gumroad.com/l/JYdba
Step 7 – Line Weight and Line Variation
This doesn’t really have much to do with how you draw a facial expression but it is still important to remember. Line weight and line variation can make your art really stand out.
Just by varying up the thickness of the lines you can not only make it look more interesting, you can direct the viewer by making certain things more pronounced.
Even small areas of shadows help to do this. Notice how the teeth stand out more with the shadows on left and right of them. This effect can be pretty useful and easy to do.
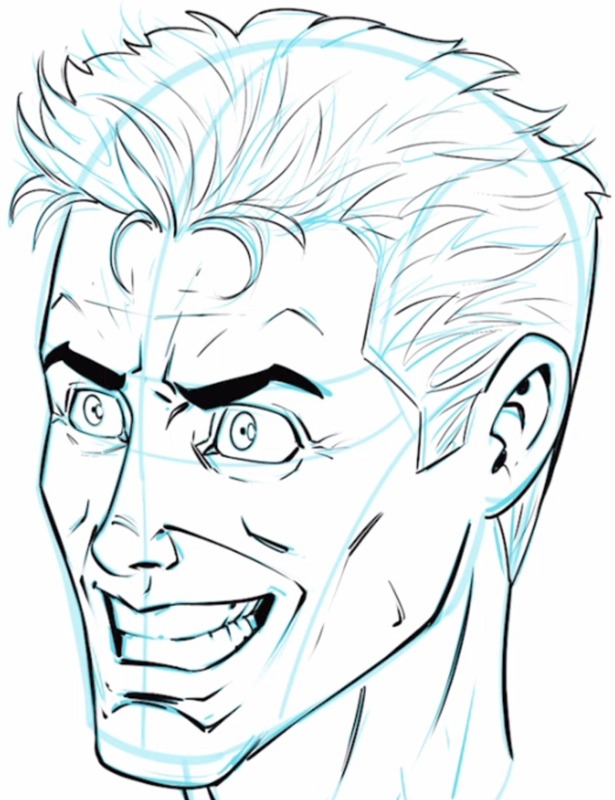
Step 8 – The Final Line Work
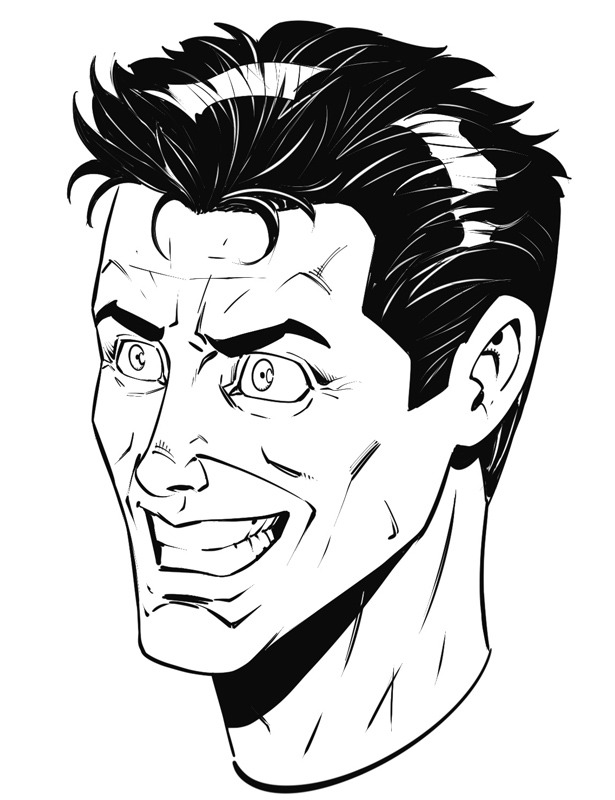
Continue on and add shadows where you need them. I like to fill in the hair when I can and erase back some highlights. It is a quick stylized way of doing dark hair that really pops off the page.
So there is our crazy expression drawn and inked in the Procreate app.
Check back soon for more step by step drawing tutorials on drawing facial expressions.
If you would like to learn more you can check out my full course here on Udemy, “How to Draw Heads from Any Angle.”
Check out more of our comic art tutorials here –
Thanks for viewing this post and more on the way. Good luck with you art!
Sincerely,
Robert A. Marzullo
Ram Studios Comics

0 Comments