Welcome Back Fellow Artists!
Today I want to hopefully motivate you to work on a basic fundamental aspect of drawing. Drawing geometric and organic forms.
This may seem like an overly basic activity but I assure you, it is something that most of us don’t practice enough and can have drastic results in our artwork.
Geometric forms allow us to draw things with a sense of structure and perspective. Turning those forms on the page opens up our minds to all sorts of possibilities.
Another aspect of drawing with these forms is getting used to looking through them. This elevates our thinking even more when trying to imagine depth and dimension on a flat 2D piece of paper.
What are Geometric Forms?
Geometric Forms are shapes that can be defined mathematically but used in a three dimensional manner.
A square in a 2D shape but once we convert that square to a cube it becomes a Geometric Form or 3D Prism.
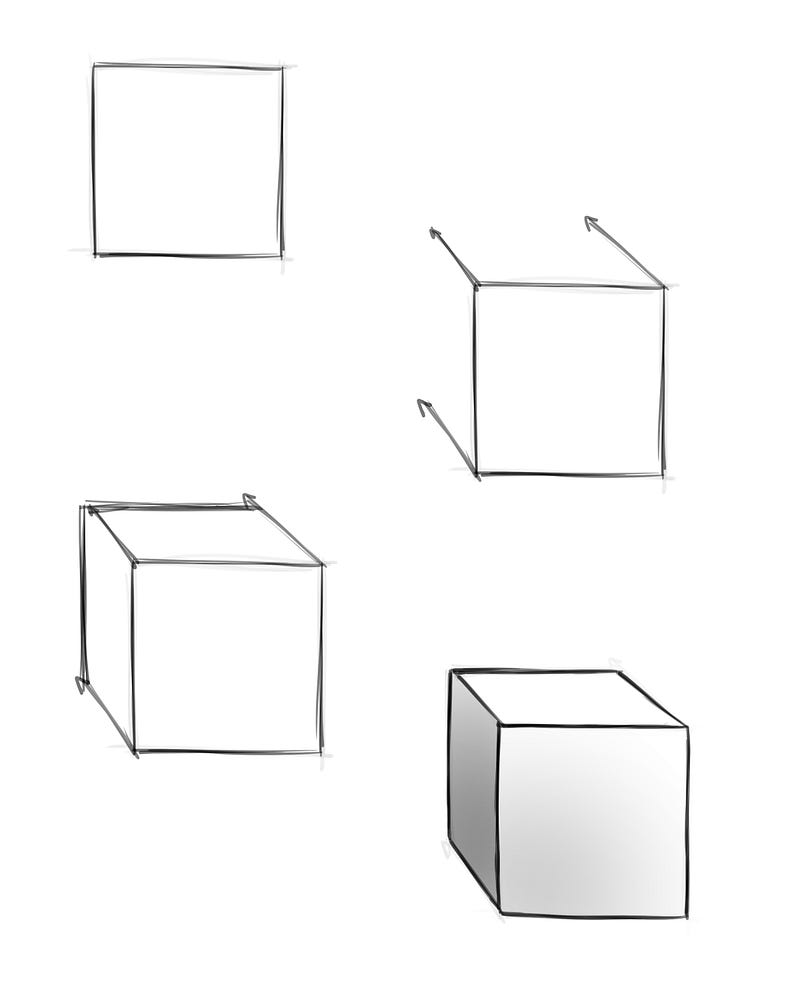
Geometric forms allow us to create a sense of perspective and structure within our illustrations.
What are Organic Forms?
Organic forms are three-dimensional shapes that appear natural, irregular, and unpredictable, often resembling shapes found in nature like flowing curves of a leaf, the contours of a mountain, or the form of an animal, characterized by smooth lines and asymmetry, as opposed to rigid geometric shapes; essentially, they mimic the organic structures found in the natural world.
Why Should I Practice Drawing Organic Forms?
Drawing organic forms has a host of benefits. Primarily if you want to draw things that appear alive or that exist in nature then drawing organic forms is extremely important.
Organic forms also have a calming effect on us since they are natural to our eye. We associate them to nature and therefore they are more relaxing to view.
Geometric shapes have a rigid appearance and are generally stiff and lifeless but also provide a sense of strength and function. Using them both is important of course and will provide a nice juxtaposition to your work.
Will Drawing Basic Forms Improve My Artwork?
Yes, practicing geometric and organic forms relates to all sorts of things that we need to draw as artists.
By drawing these various forms we are exercising our minds and stretching our imagination.
A big part of this is because when we practice drawing these forms in an abstract manner we avoid our critical thinking and tend to experiment more.
Over time as we draw a variety of different forms we learn to move more freely upon the page. We are basically programming our mind to accept these forms as possible choices. Over time you will naturally become more confident at drawing more complex ideas because of this.
Practicing any particular aspect of your work yields amazing results. The task may seem boring and repetitive at times but stick with it and you will be amazed by the long term results.
You can see this same idea at work within sports. They practice drills over and over until it becomes a response. Then they creatively add it into the way that they play the game.
How to Draw Geometric Forms?
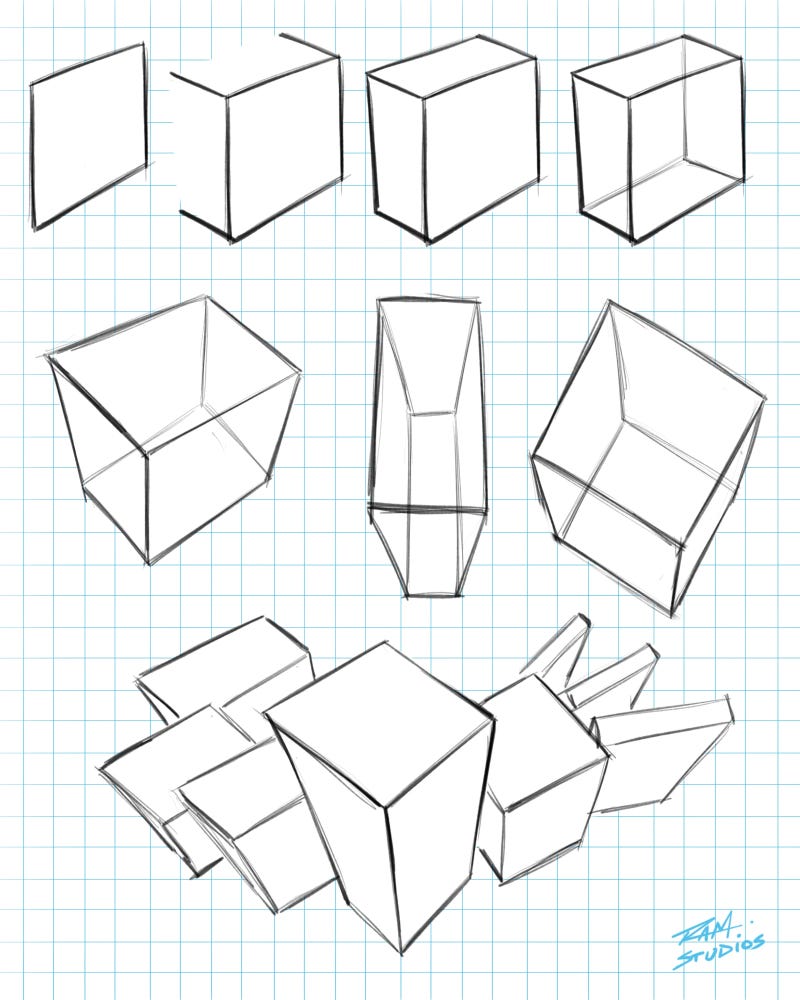
Let’s start with a cube and practice turning it on the page. This is a great exercise since it relates to so many things around us.
After we get warmed up with the basic forms we will move on to the more organic examples.
Here is a practice sheet for you to work with —
Next let’s work on the cylindrical version. This is as simple as drawing two circles ( or ovals to apply a sense of perspective. ) and connecting them with two lines.
The two lines will be parallel from a straight view and if you are drawing a bit of perspective they will appear to converge towards a vanishing point.
Here is a practice sheet for you to work with —
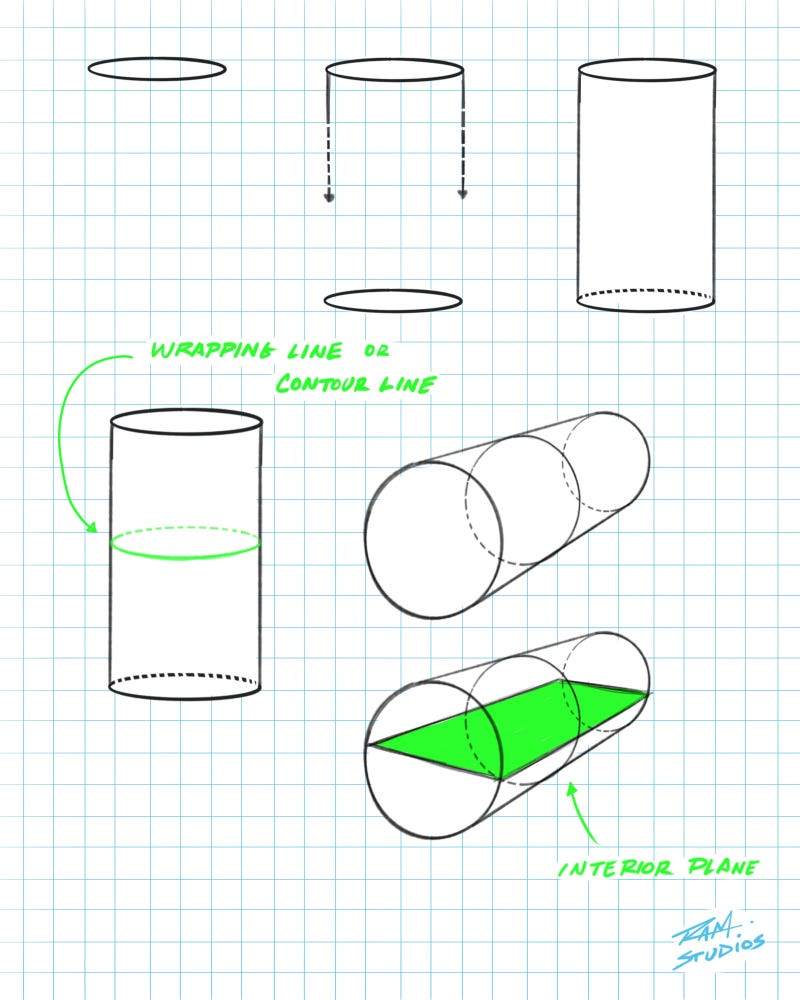
Notice that on the second cylinder that is in perspective I drew a rectangle or floating interior plane through the center of the form.
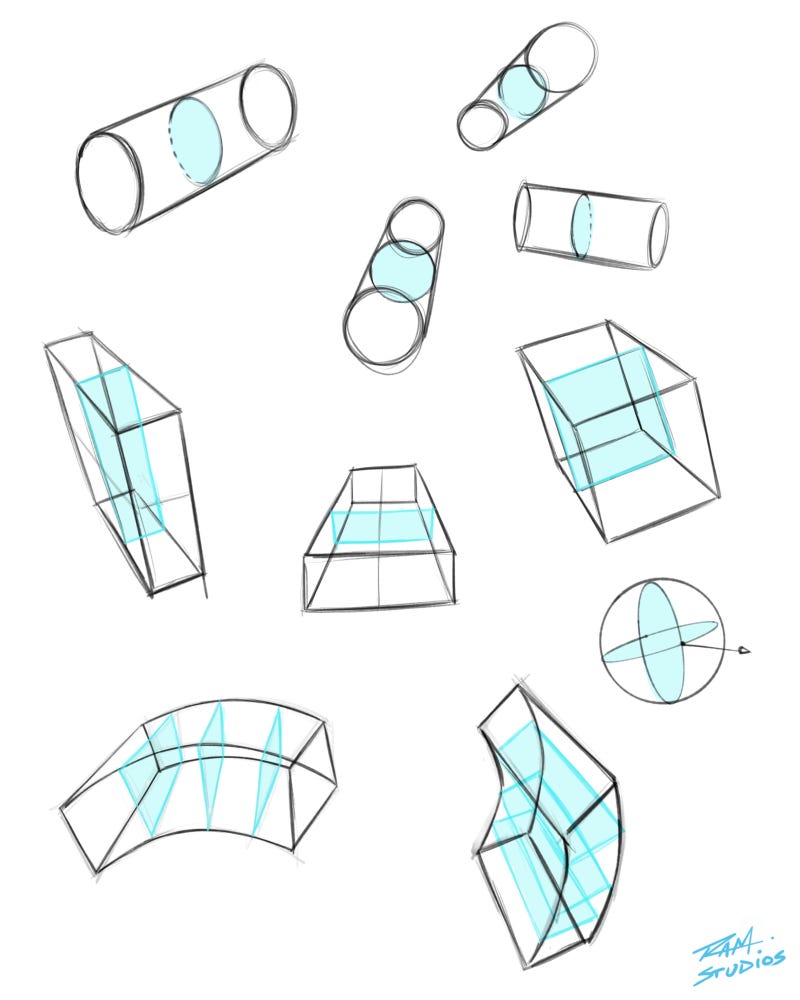
This is another way to envision a more dimensional and complex form. I find this to be great for architectural style concepts. It provides me with ideas on how interior shapes or forms might look within a structure.
Visualizing the interior of these forms and being able to see through them is a very powerful skill to develop. Here are some more sketches for you to try out…
Twisting the Forms
For the next step I would like to show you how to bend and twist the forms. This will warm us up to the more organic forms that we will be doing shortly.
We will start with a rectangular prism and focus on the top and bottom plane. To practice this just draw a rectangular shape with any tilt or perspective that you envision, then add the next rectangle at a different orientation.
Then connect the two rectangles together with organic or curved lines. Finally, add the cross contour lines which helps to further explain the dimension of the forms.
Then practice this same exercise with as much variation as possible.
Here is a practice sheet to work with —
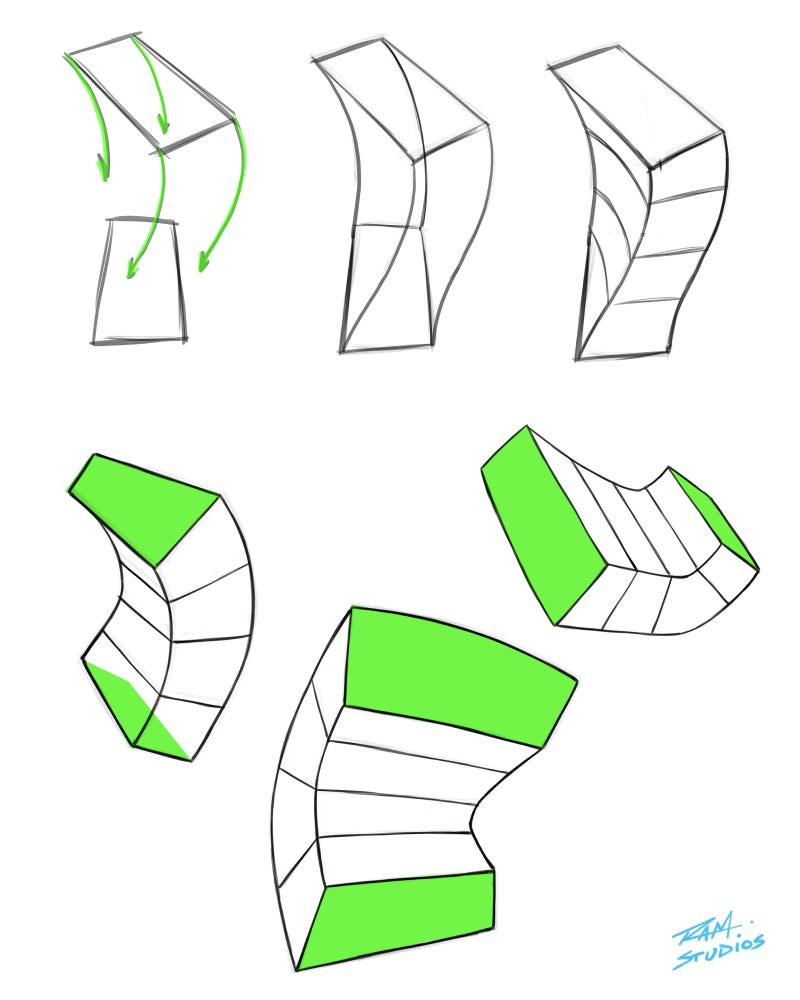
So hopefully by now you are starting to loosen up your drawings a bit. Combining form with a sense of gesture can have some very powerful effects within your artwork.
Drawing Organic Forms
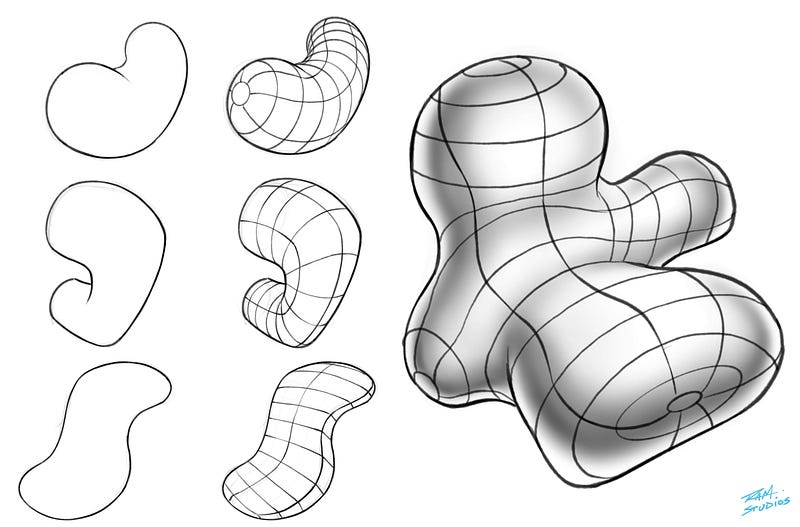
For these next examples we will take a more abstract shape and convert it into a three dimensional form.
Start by drawing a basic shape on your canvas. Something like a bean or a fruit. Don’t worry about it being symmetrical and just move the pencil around the page with a bit of fluidity.
This doesn’t need to resemble anything particular if that helps you to create more variety at this stage. Even a blob tends to look pretty cool by the time we add the cross contour lines.
Also, don’t feel bad if you keep repeating the same pattern. Old habits die hard and I do the same thing. Over time you will break out of the rut and find some new shapes to explore.
Here are a couple basic examples to work with —

In the sketches above notice that the perimeter of the basic shapes is pretty random. The first one looks like a bean but the rest aren’t very distinguishable.
The green line running through the middle of the shapes ( 2nd Row ) are the Center Line. The little arrows pointing up are to help explain the curvature of the form.
I am drawing the Center Line and moving it up and down through the form to create a sense of depth and dimension.
Think of the highest points of the form as Convex and the recessed areas as Concave.
Next we add the blue lines in both directions to create a grid like pattern. Make sure to keep the form in mind as you draw these. The more of the form you can explain with these lines, the more depth and dimension your art will have.
Here are a couple more to try out. You can also apply some light and shadow to add more depth and dimension to the forms.
Practical Examples of Organic Forms
Now you can take what you have learned and use it within your studies. Try finding organic things to draw but use these methods to explore the forms.
For this one I drew an apple. By paying special attention to the direction of the forms and by drawing the cross contour lines, I was able to have a better understanding on how to draw and render the apple.
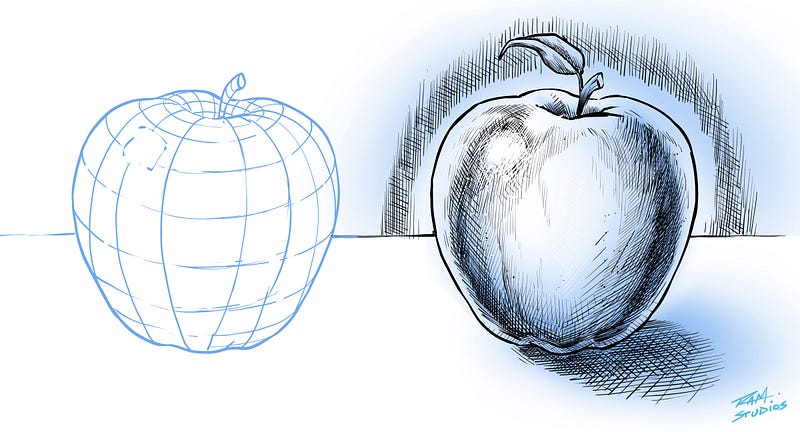
Cross contour lines help us to visualize the depth and dimension as we add in the light and shadow. This works on everything that we draw so practice them often!
I hope this art tutorial has been helpful to you. Please let me know if you have any questions and I will do my best to answer them.
If you would like to learn more on this subject, I have a full course that breaks down these concepts step by step. You can view the content here on Gumroad —
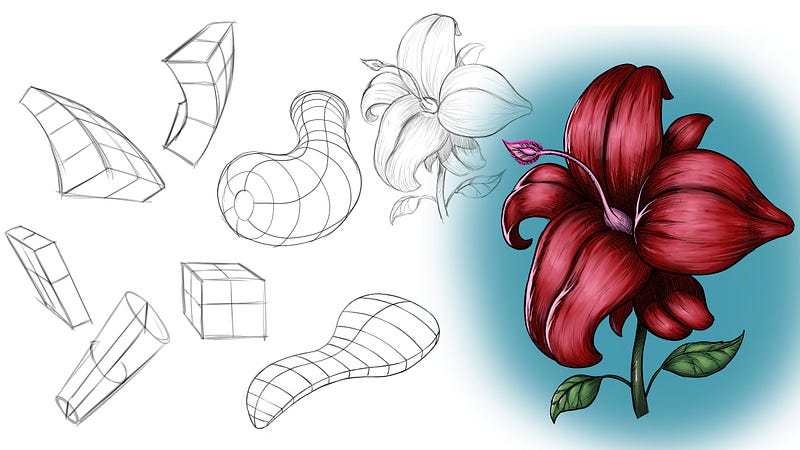
“How to Draw with Organic Forms”— Click here…
Thank you for viewing my content and good luck with your art! 🙂
Robert A. Marzullo
Ram Studios Comics
0 Comments