
Welcome back fellow Artists!
Today I want to share a few tips and techniques on how to draw the back of the arm. This area has been a battle for me over the years. There is a lot going on here and since we are so used to focusing on the front of our characters more often, the back can tend to be more difficult.
Not to worry, I will shorten your painstaking studies with a few pointers that have served me well. Let’s dive on in and simplify this topic!
Quick Anatomy Lesson
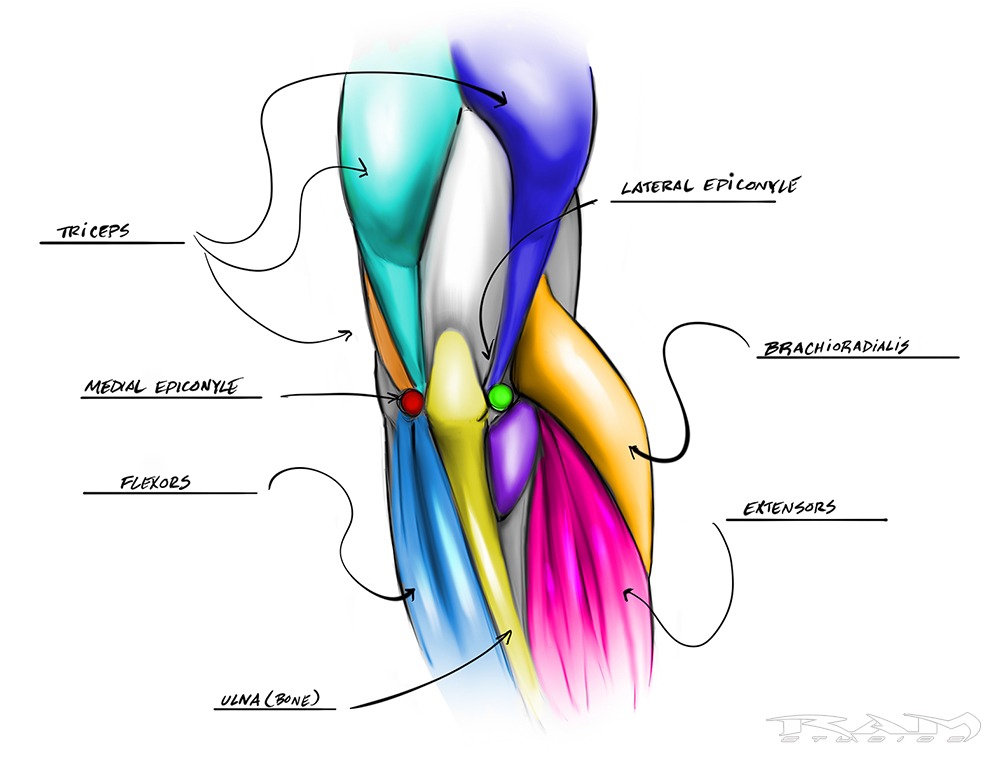
I created this diagram for you to see how beneficial it can be to pay special attention to the Epicondyles of the forearm. The Medial ( Closer to the center of the body ) is in red and the Lateral ( Outside ) is in green. Notice how many of the muscles converge to these points in the arm.
Since there is a lot to keep in mind with this area of the body I will simplify and explain what to focus upon to aid in the drawing process.
- Notice that I have grouped the Extensors into one large category ( Magenta Color ). These go from the Lateral Epicondyle to the back of the hand.
- Now take a look at the Flexors ( Light Blue Color ). They go from the Medial Epicondyle and travel down to the palm of the hand.
- Another thing that is important to pay attention to is how the Triceps go down to these landmarks as well. You can also see how the Long Head ( On the left or Medial Side ) is much larger by comparison to the Short Head.
- The Triceps Tendon is the White Area inbetween the Elbow and the Triceps. Notice that is is not straight up and dow but rather angles towards the right or Lateral side of the arm.
- Finally take a look at the Brachioradialis muscle ( Orange Color ). It is tightly seated next to the Short Head of the Tricep and then rolls over and around the Extensors toward the thumb side of the hand.
Hopefully those observations will serve you as well as they have me but observations alone usually don’t cement the ideas into my mind. I need to draw what I learn to retain it. Sometimes over and over again. Ah, the joys of being an artist!
Let’s jump into a more practical example now!

In these first two steps I want you to focus on the length of the arm you want to draw. Just use simple circles and lines. No need to draw the actual skeleton, unless you really want to, then by all means go for it!
At the elbow area, make sure to draw the two circles for the Epicondyles. The center circle down to the bottom circle will represent the Ulna and the overall length of the forearm.
Next you can add the volumes of the muscles. I used a more silhouette based approach here with some angled lines. Angled lines can help us to figure out the direction of the muscles as well as simplify the forms.
Try to pay attention to where the peaks of the muscles are and how the arm is asymmetrical.
Organic Lines and Shadows
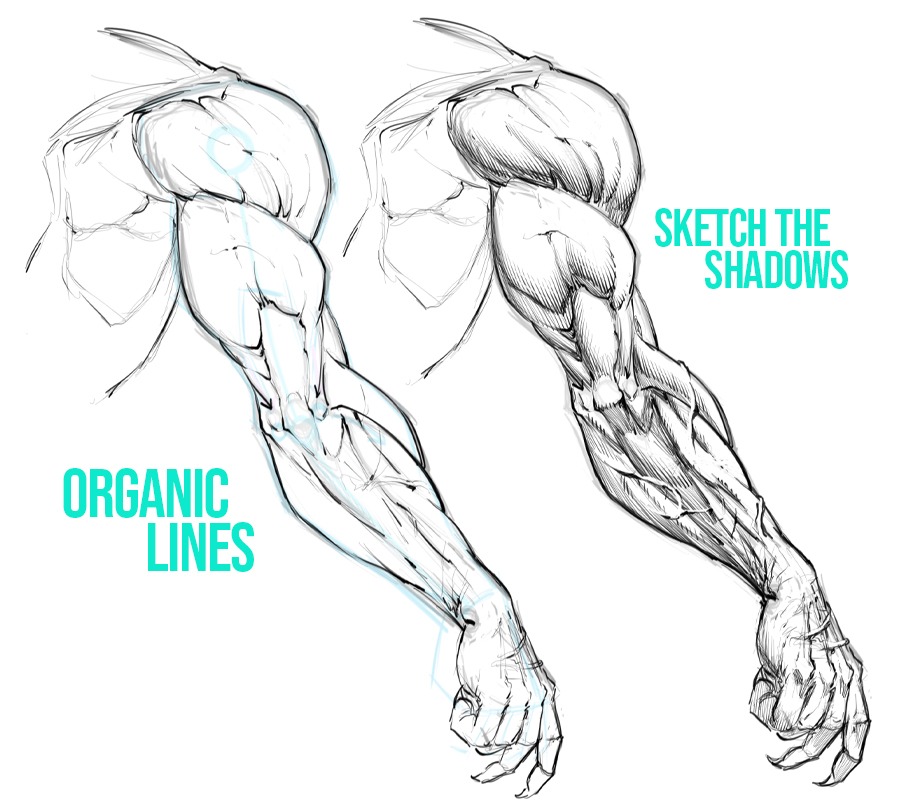
For the next step you can draw over the structured version and begin to illustrate the anatomy. Using the Epicondyles as your reference points should help you to place the muscle groups.
Remember that the Elbow or Olecranon is part of the Ulna and that extends down to the pinky side of the hand.
Also, keep in mind that you can follow this entire illustrative process in the video link down below if you are struggling to follow along.
For the next step you can draw in the shadows and add some light rendering. I tend to sketch this area of the work to keep ideas flowing. If I am too tense at this stage then I will loose the organic feeling to the anatomy, so sketching helps to avoid that.
Loose lines have more energy so cleaning up the work too soon as well as too much can make it overly rigid and lifeless.
Inking the Artwork

Now we can begin to redraw the artwork with cleaner lines. I recommend trying to be as organic as possible for anatomy. It doesn’t mean you won’t add small amounts of angles here and there. It’s a bit of a balancing act. Too many curves and things can look soft and rubbery. Too many angles and it can look overly rigid and tense.
Just play around with these concepts to hone your style. Generally angles will be for the bony landmarks and curves for the muscles but again it is a bit of a mix and personal taste.
Next we will apply the shadows. Here I find it to be helpful to add larger shadows to the bigger muscle groups first and then tie into the smaller muscles. Keep your light source in mind as you move around the forms but be careful not to segment each muscle entirely as you place your shadows.
All the individual muscles should make sense as a larger whole, so we have to shadow them in a way where they are defined but shouldn’t appear to be legos stacked on one another.
In the video I explain how each muscle has a different thickness and belly to them. We need to couple that idea with the fact that the forearm is basically a large cylindrical object. The muscles generally read better if they flow in and out of the larger form.
A good way to achieve this is to break up the lines and shadows on the light source side and where the muscles become less defined or fade into the underlying forms.
Finally! The Rendering Stage!

Finally! The glorious rendering stage or what I like to call it, “The Icing on the Cake!” This is where we bring all those previous concepts together into a more dimensional and stylized illustration.
I like to experiment with the cross hatching a bit but in most cases it is best to push the lines in the direction of the form. Wrapping the lines around the form helps us to reinforce the dimension and volume of the anatomy.
To add another layer of value and tone you can cross hatch at various angles and with varying degrees of line thickness. There are all sorts of ways to implement your style into this part of the work so just play around and study from your favorite artists.
I like to add the veins towards the end of the inking process. Notice the little sketch at the top right. Here I am trying to show you how the veins look better if they wrap around the underlying form versus just drawing them in random directions. Think of them like ropes wrapping around a cylinder but then add variations such as small bumps and imperfections.
So there you go! I hope this tutorial has been helpful and I will be adding more so please come back soon.
Good luck with your art and have an awesome day! 🙂
You can also watch the narrated video demonstration of this drawing process here on my Youtube channel –
If you would like to learn more on drawing anatomy I have courses on my teaching site. You can check out my course on Drawing Stylized Anatomy here –
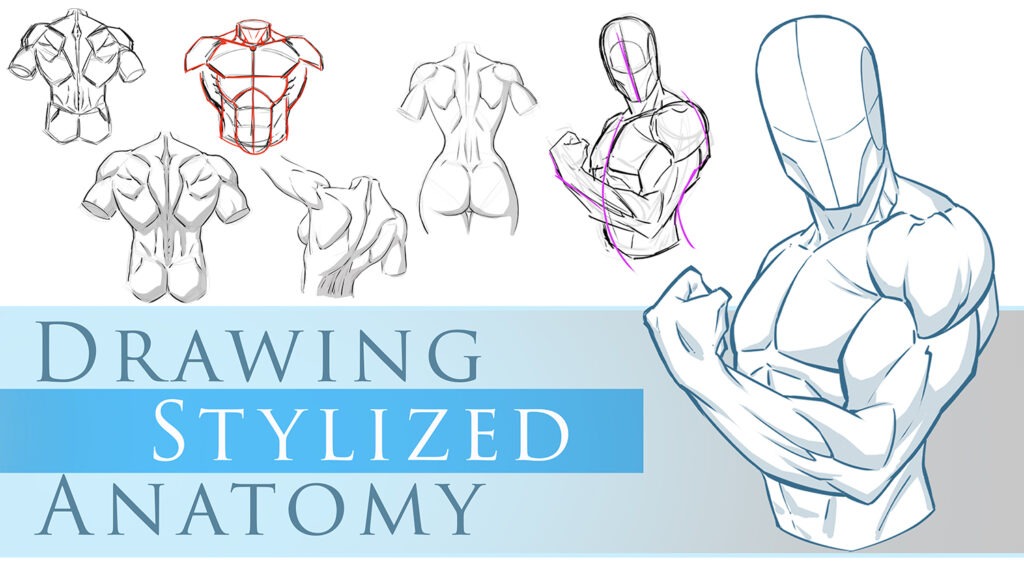
Visit my course here – https://www.online-courses.ramstudioscomics.com/courses/how-to-draw-stylized-poses-and-anatomy-figure-drawing
Sincerely,
Robert A. Marzullo
Ram Studios Comics
0 Comments