Today you will learn how to draw hands by learning a few of the major techniques that make this complex topic much easier to work through.
You will learn about –
- Anatomy of the Hand
- Proportions
- Gesture Drawing
- Structure and Organic Drawing
Let’s first start by looking at the bone structure beneath the skin. This can help you to understand why the hand looks the way that it does and why it can bend and contort in so many ways.
We won’t get into naming all the bones here, you can always look that up if you are interested in that but here I want to talk about the Metacarpals and the alignment of the knuckles.
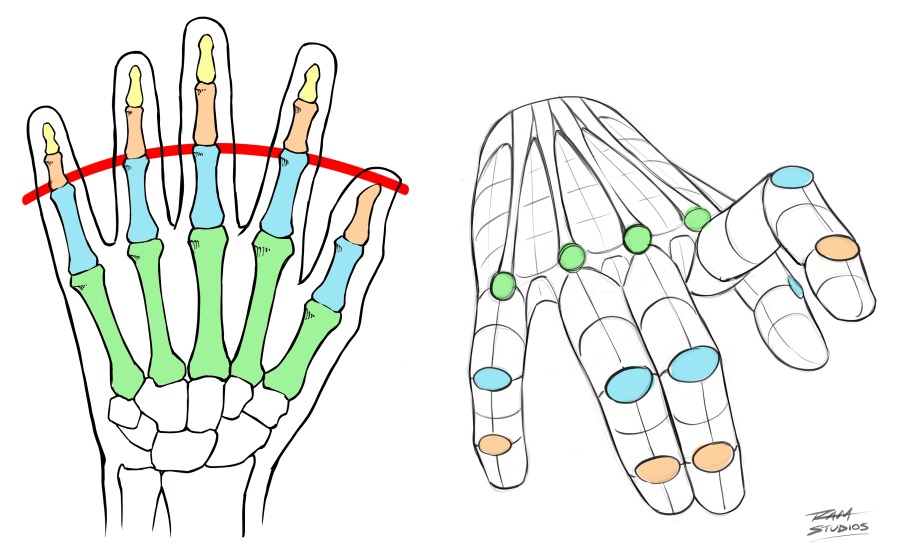
Notice that the first row of Metacarpals are located in the palm area and hidden by the tissues of the hand. ( Green Area on the Left ) This is important to get used to thinking about since it shows why the hand is so flexible from side to side or from the thumb to the pinky.
Also, notice that the first row of knuckles are located in the palm area. As beginner artists we tend to misplace these and then the mistake grows outward and effects more of the illustration. A sort of bad domino like effect.
Notice the Proximal Metacarpals ( Blue Color ) are the biggest visible segment of the fingers and thumb. Another thing to note is that the top of the Proximal Metacarpals in the fingers align to the top of the thumb. Notice the Red Curved Line.
IF you look at the illustration on the top right you can see that even in a more dynamic pose of the hand that the knuckles are great for aligning the forms. This can help immensely since the fingers have a large range of movement and we can ofter get confused while drawing them.
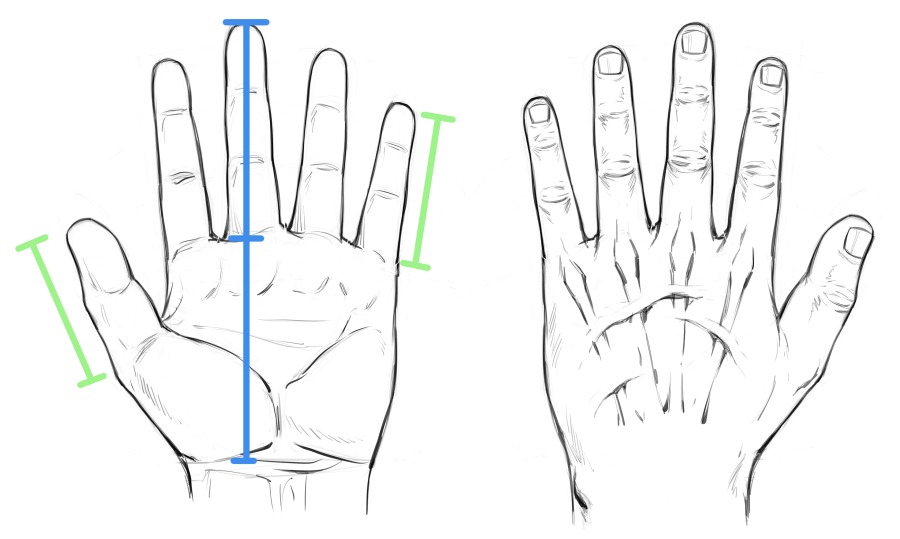
Proportions of the Hand
The main one that I like to pay attention to is that the middle finger is roughly the height of the palm of the hand.
This makes it much easier to check the larger proportions of the hand by comparison. Also notice that the height of the thumb is roughly the same as the height of the pinky.
It’s also good to study the angle from the middle finder down to the pinky as well as the height comparison of the pointer finger to the ring finger.
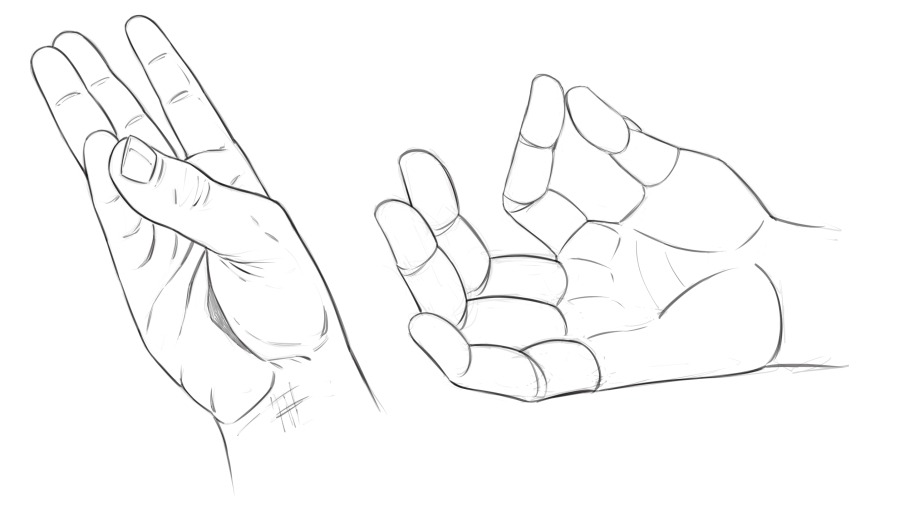
Studying Hand Poses
It’s also good to pay attention to the relationship of the fingers. Notice that the pinky and the thumb have a sense of alignment when brought together, where the pointer finger tends to curl over to make a similar gesture.
Hands can make so many expressive poses that you have to make time to study and sketch them as often as possible. It is good to look at your own hands and even use a mirror when drawing them.
When I am focused on improving my hand drawings I set up a schedule or a commitment. It might go something like this, “For the next 2 weeks I am going to draw hands for my daily warm up sketches. 10 new poses x 10 days = 100 poses.
Then I will pin them to my wall and look them over for the next few weeks. I find this to be very helpful when trying to improve any and all aspects of my artwork.
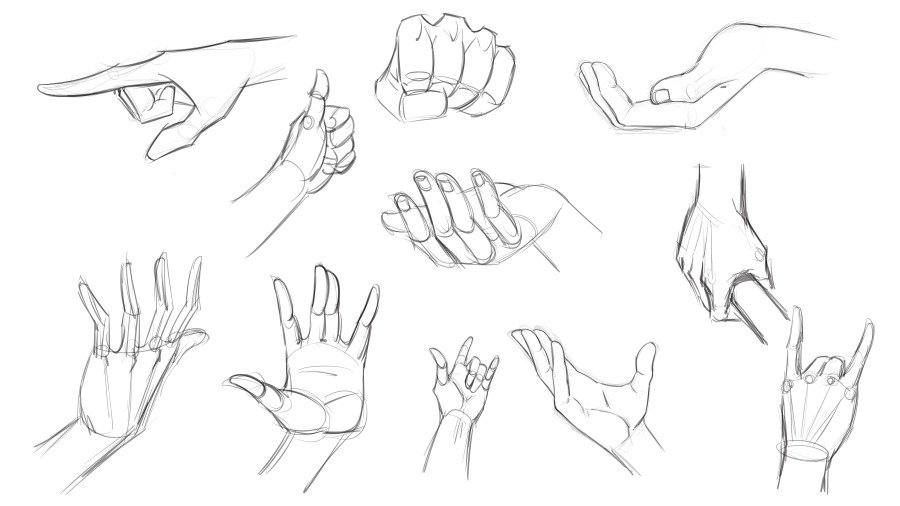
Gesture Drawing of the Hands are Very Important
Practicing lots of quick gesture drawings of the hands can be very beneficial. You will start to gain a better understanding of the variety of poses the hands can make.
Make sure to keep things simple here. You want quantity over quality in this case. By logging in a lot of quick and simplified sketches of the hand you will learn much faster. You can always go back and reuse these. Then you can choose to refine them as needed.
When focusing on the gesture of the hands, make sure to throw your lines more and avoid going into details. You are looking for a sense of flow and energy. Try to use the least amount of lines as possible to explain the forms and move on to the next.
I find this to be the best exercise for improving my ability to draw hands. It also translates very well to comic art and learning to simplify more complex concepts.
Structure and Organic Drawing of the Hands
There is a time and place for all methods of drawing the hands and it is important to learn when to use them.
After you have a good idea of the various hand poses you can then explore more detailed renderings of them. Structure can help you with the more complex poses.
Think of it as a blue print for the rest of the illustrative process. With a good sense of structure and base forms it becomes much easier to draw the organic lines throughout.
In the illustrations below I developed the structured versions until I felt comfortable with the design of the hands, then I added organic lines and rendering to make the hand feel more realistic….well, in a stylized way of course!
Feel free to click on any of these images and use them for reference!

Here are some of my Youtube Videos on How to Draw Hands. Please LIKE – SHARE – SUBSCRIBE for new content each week!
I hope you found this content to be useful and informative. If you want to learn more on drawing comics, perspective, figure drawing, and digital painting, you can visit my online course content here –
Ram Studios Comics Art School Online
https://ram-studios-comics-art-school.teachable.com
Get my Custom Brushes and other Digital Content here on Gumroad –
http://www.gumroad.com/robertmarzullo
Want to learn my best tips for Drawing Leg Anatomy? Check out another one of my tutorials here – https://ramstudioscomics.com/index.php/2022/08/11/5-tips-on-how-to-draw-leg-anatomy-tutorial/
Thanks for stopping by and keep up the hard work! 😉
Sincerely,
Robert A. Marzullo
Ram Studios Comics
0 Comments