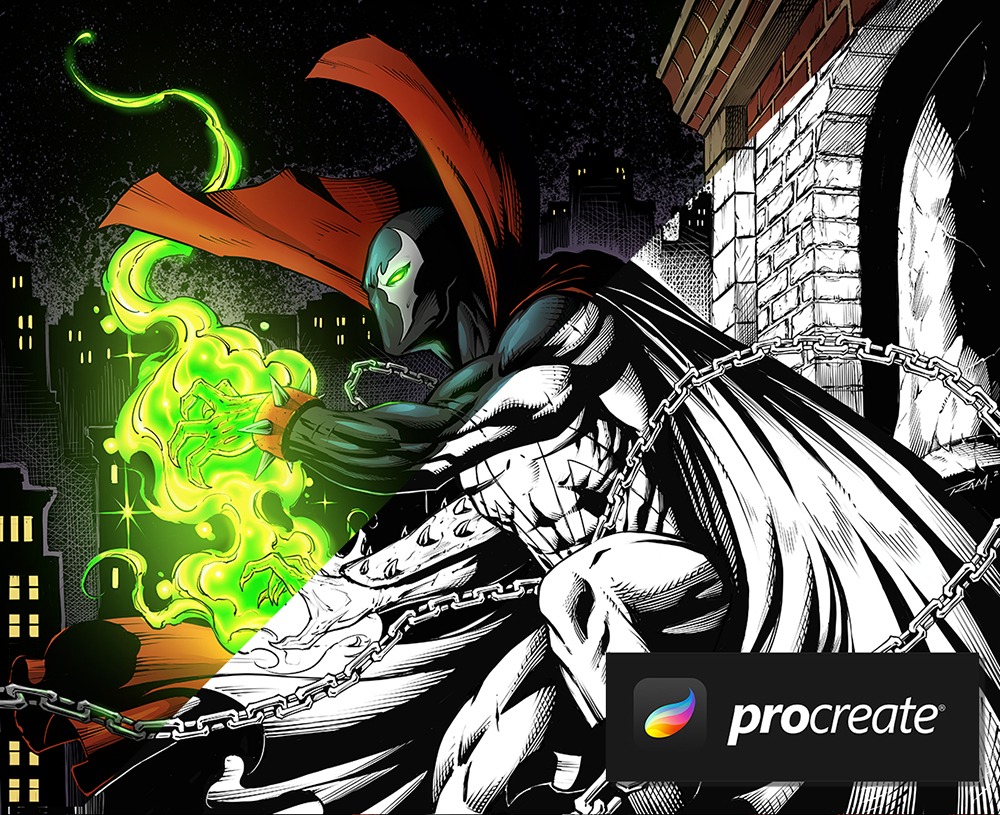
Do you want to learn how to color comics with Procreate? In this example I will be using some Spawn fan art that I drew inside of Procreate. Spawn is property of the amazing artist and creator Todd McFarlane.
Here are the steps we will covering in this post
- Preparing the Art File to Color
- Laying in the Flat Colors or Flats
- Making Selections to Color in the Highlights
- Making Selections to Color in the Shadows
- Adding Soft Shadows with the Lock Transparency Feature
- Using Blending Modes for Power Effects
- Final Adjustments to the Colors
First, let’s cover some of the commonly asked questions about the actual art file.
What size is the original art file?
16″ Tall by 19.63″ Wide at 300dpi. I generally work at 11″ x 17″ at 300dpi or 9″ x 16″ at 300 dpi. The main thing is a balance of good resolution vs. the amount of layers you want or need.
At this particular size I was able to have a great resolution with 19 available layers. This can vary based upon your type of device and with practice you will generally use less layers.
Do I need the file to be in a specific format?
I like to work with the original non compressed file when I can. You have to be careful with Jpegs since they use compression. If the file is large enough then it generally won’t matter but keep an eye out for it just in case.
Great file formats that are lossless ( meaning they retain the image quality. ) are Tiff, PNG, and PSD. ( Keep in mind PSD can be both lossless and lossy. )
You also have options that will retain the layer data. Generally PSD is the best for this but you can also use PDF and Tiff.
What Files Can I Import in Procreate?
Procreate is very versatile. You can import PSD, Jpeg, PNG, Tiff, GIF, and obviously other .procreate files. Just remember to check your file size under the wrench icon > Canvas > Canvas Information.
You want to be aware of how many layers you may have left based upon the current document size.
Step 1 – Preparing the Art File to Color
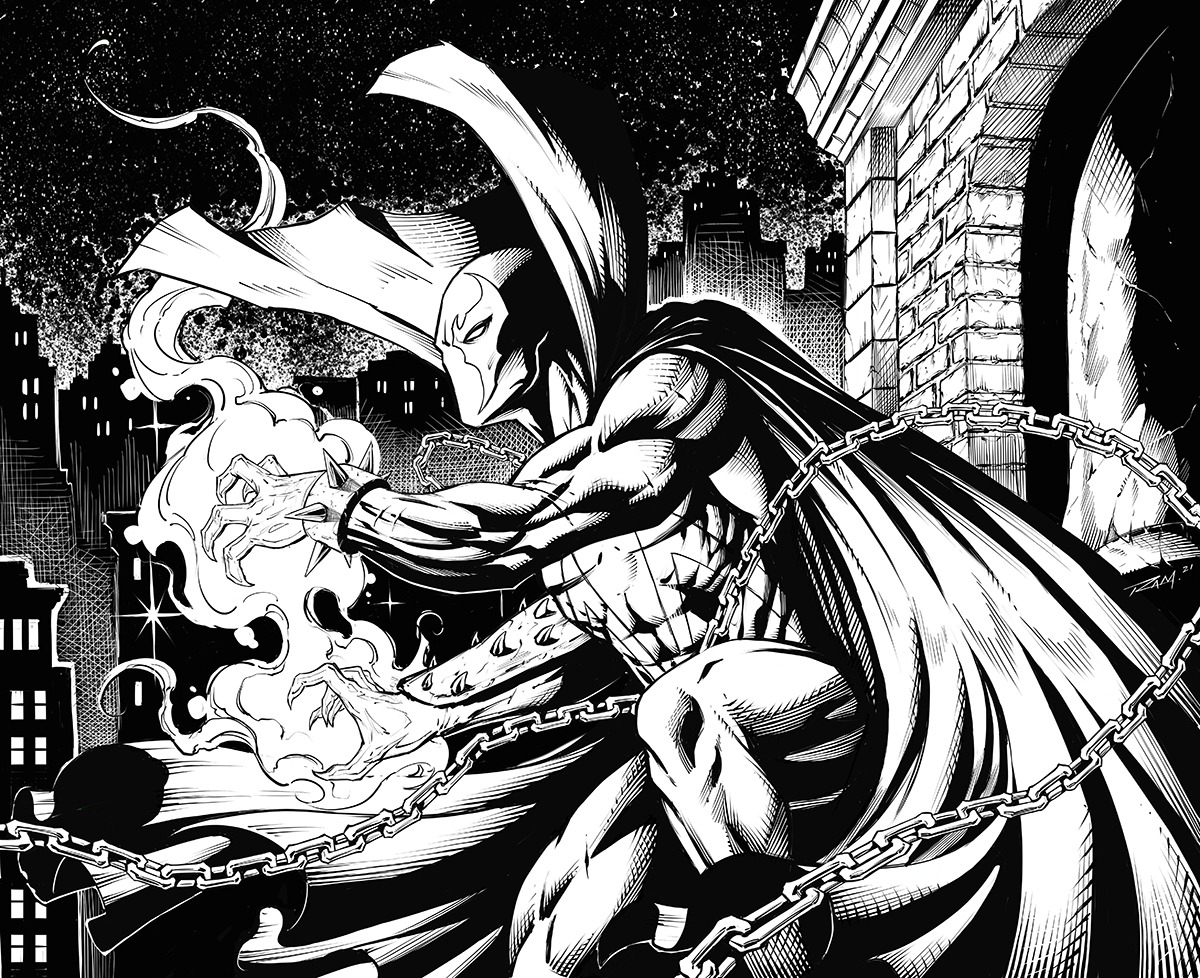
First I start with a flattened version of the art file at a high resolution.
This file is 16″ Tall x 19.63″ Wide at 300 dpi. Plenty of resolution and at this size I have 19 available layers to work with.
If you get a file that is merged down with the white background you can still use it. You just need to turn the blending mode to “Multiply” first.
Then add all your additional layers beneath it. You can even still color the line art on top if you need to at the end of the process!
You just have to be creative with your blending modes.
Step 2 – Laying in the Flat Colors or Flats
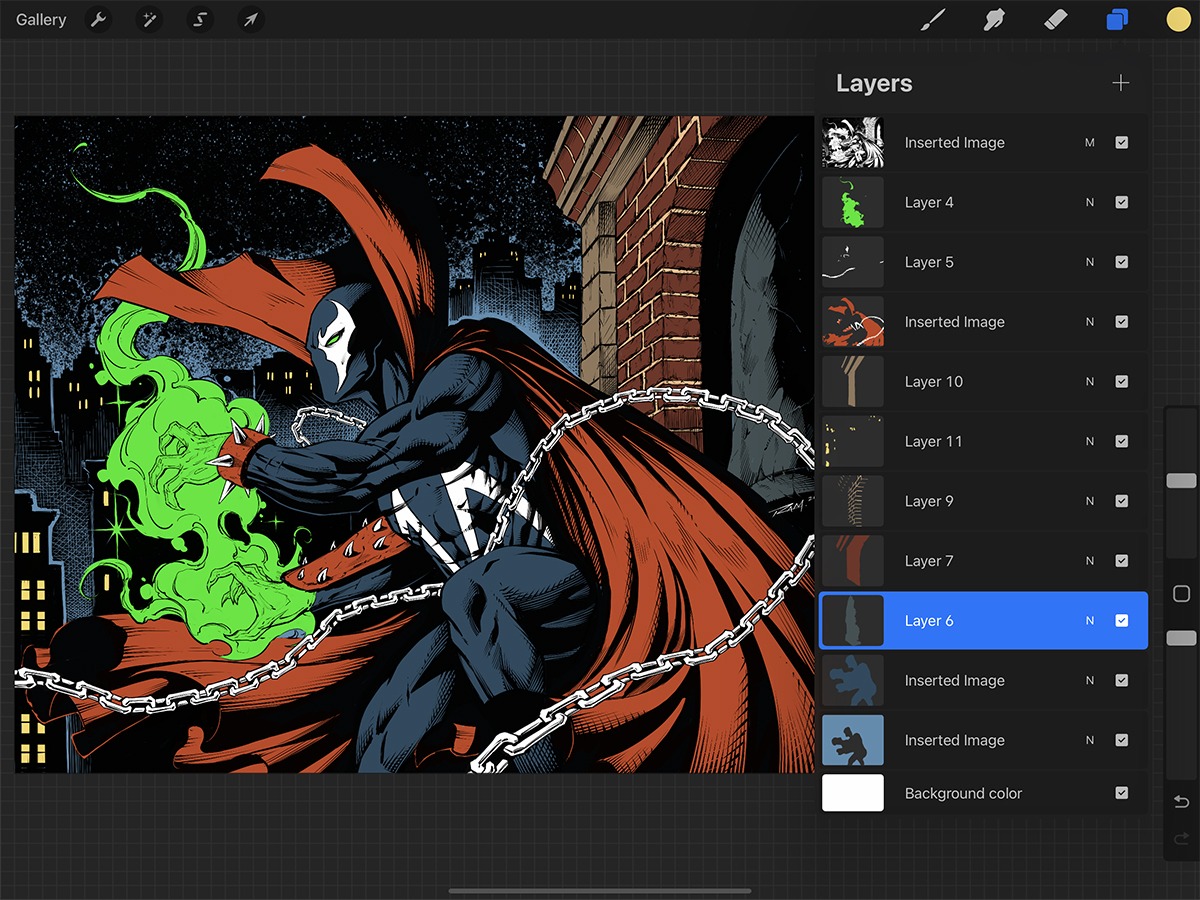
Here you can create layers and color in each section that you need to itemize.
Another way to do this that most comic professionals will recommend is to start with a full backdrop of color and “cut” each area out then shift the color to what you need.
I prefer to color each section with a solid brush. Then add add layers over the top as I will demonstrate here shortly.
Step 3 – Making Selections to Color in the Highlights
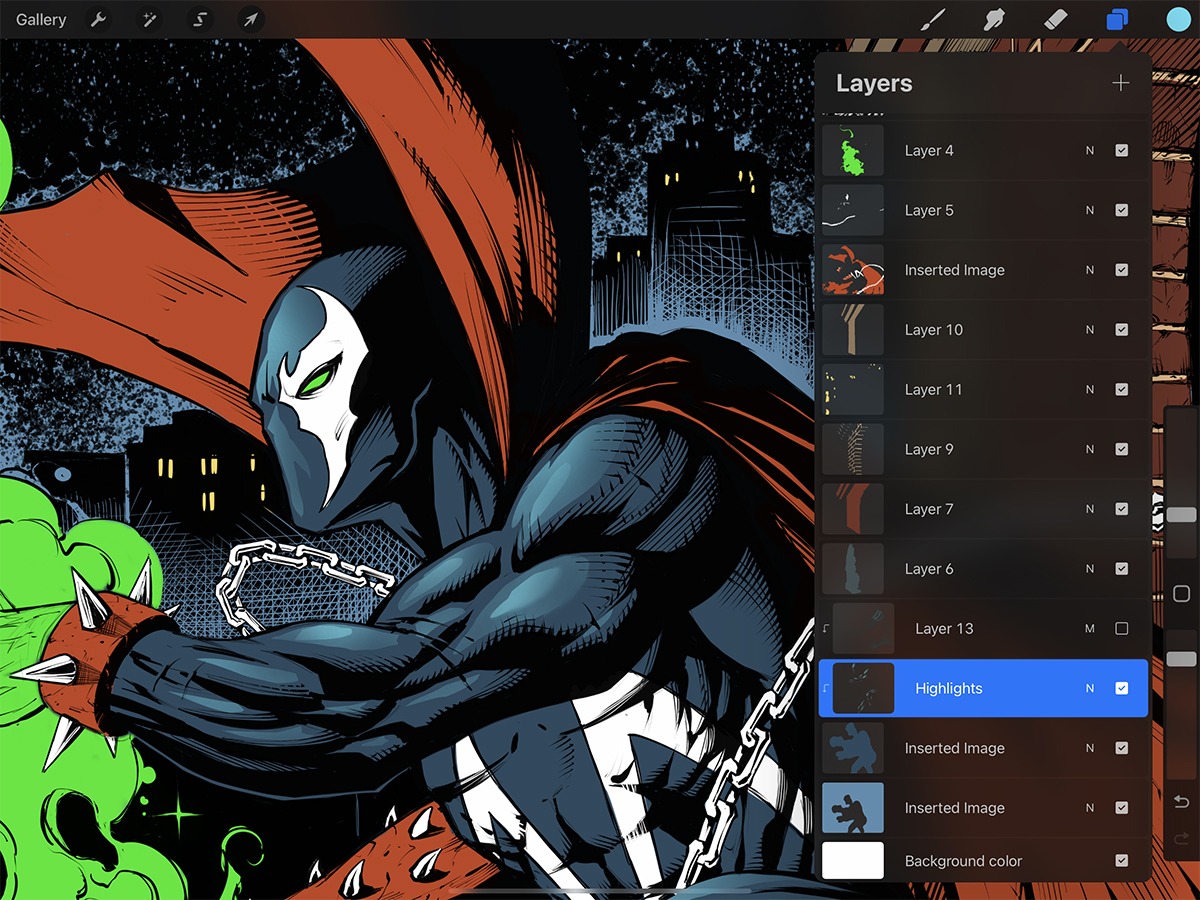
Now we can grab the selection tool on the top left of the screen. It looks like a little “S” to the left of the pointer icon.
The selection tool in Procreate is an amazing tool for coloring comics. You can draw nice clean selections, stop and go point to point by tapping on the screen with your Apple Pencil, then go right back to drawing the selection.
Also, you can undo and redo any part of the selection that you stop at. It is a great way to create the shapes you need for cell shading.
Notice on Spawn’s arm that I have drawn out a few shapes that sit on the top left of the anatomy. Then I take a large soft airbrush and paint in a lighter blue color.
Also notice in the image above that I have added a layer over the flat dark blue color of his suit. You want to tap that layer and set it as a “Clipping Mask.”
This allows us to paint freely over the original flat color and gives us more room for edits later. Now we can change the blending mode of that layer without impacting the underlying color.
Notice if you click on the image above you can see a small arrow on the layer labeled “Highlights”. This arrow shows you that it is a clipping mask of the layer below. You can add as many of these in succession as you need to.
Step 4 – Making Selections to Color in the Shadows
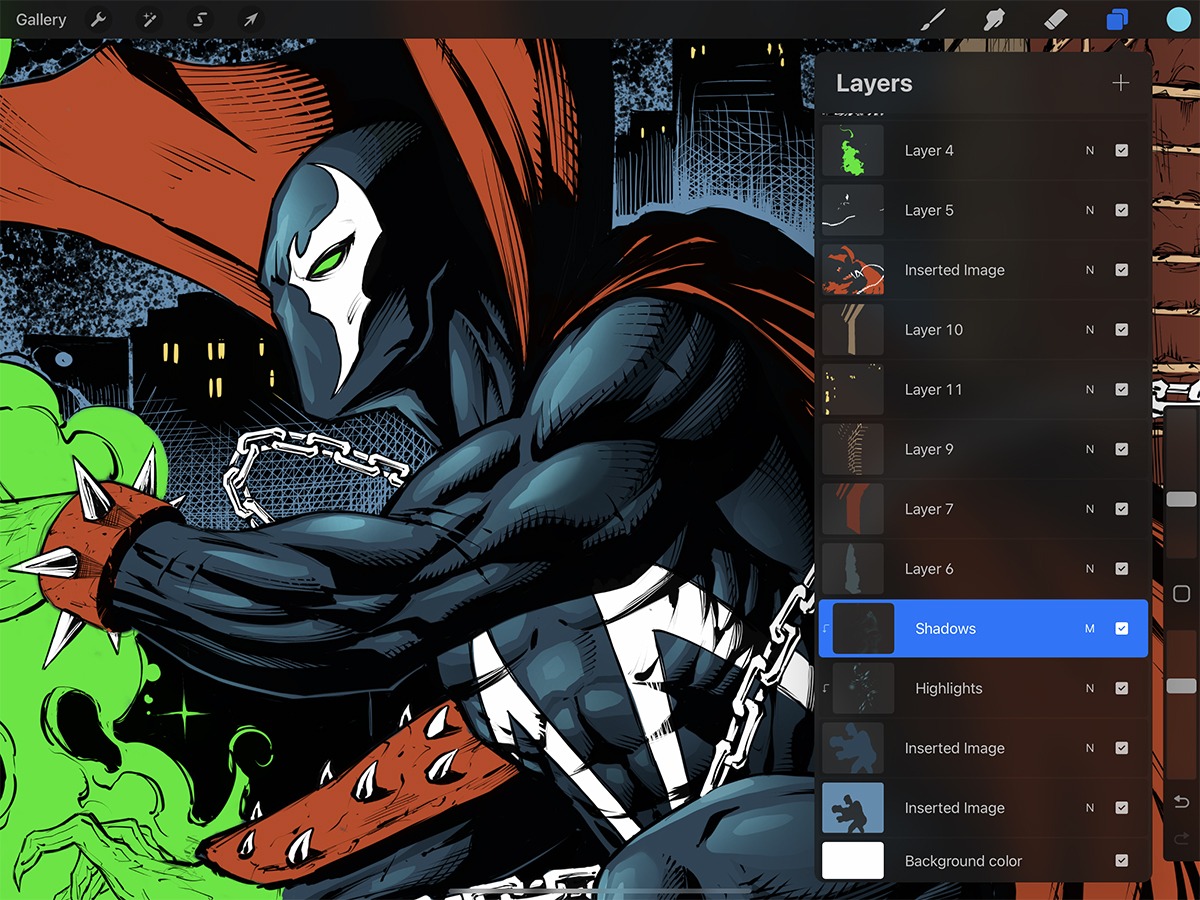
Now we basically repeat the same process for the shadows. Using the selection tool to isolate the shapes of shadows.
We can even freely paint larger shadows without a selection. How do you ask? The clipping mask is making that a breeze. It references the larger base flat color and automatically keeps that paint into that shape as if it was already selected. Pretty neat right?!
You can also change the combine mode to the layer for some neat effects. Always remember you can control the blending modes on the brush and layer level.
Step 5 – Adding Soft Shadows with the Lock Transparency Feature
Another cool feature in the Procreate app is the “Lock Transparency” feature. By doing a two finger swipe on the layer you can see a tiny checkered pattern behind the thumbnail of your art.
This means that the edges of the art are basically locked and no paint will go out of the perimeter of this shape. This can be a good way to conserve layers if you feel more confident about the effect you are getting ready to apply.
Notice in the image above that I have applied shadows with a large soft airbrush over the cape and the white areas of his suit. With each of those areas locked I can brush across them freely and apply the paint without a selection.
I can still chose to add a clipping mask over the top if I need it but again, this can be a great way to cut down on the use of layers. We only have 19 to use in this example and I have already used 13.
Just keep in mind that if you are happy with a certain part of your illustration and running low on layers you can merge those clipping masks down to the base flat layer.
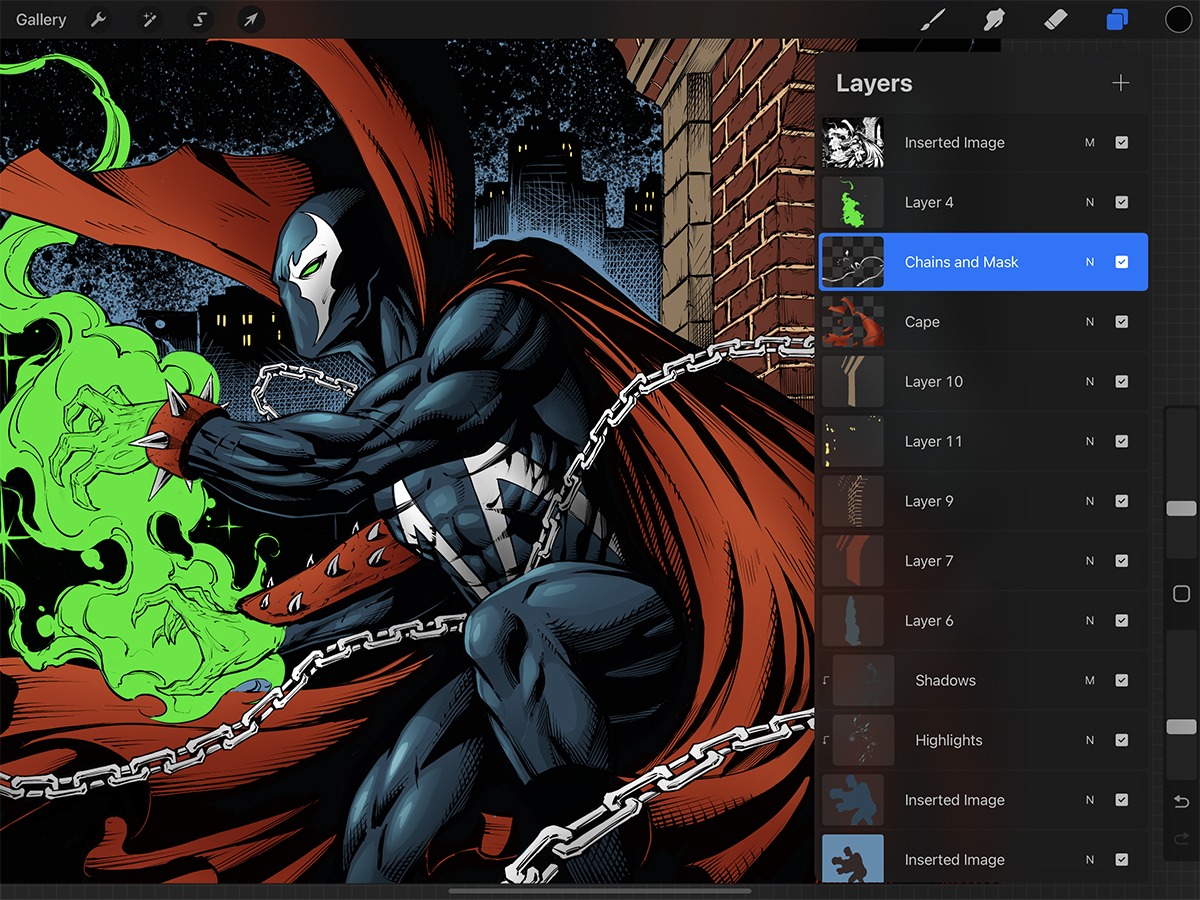
Step 6 – Using Blending Modes for Power Effects
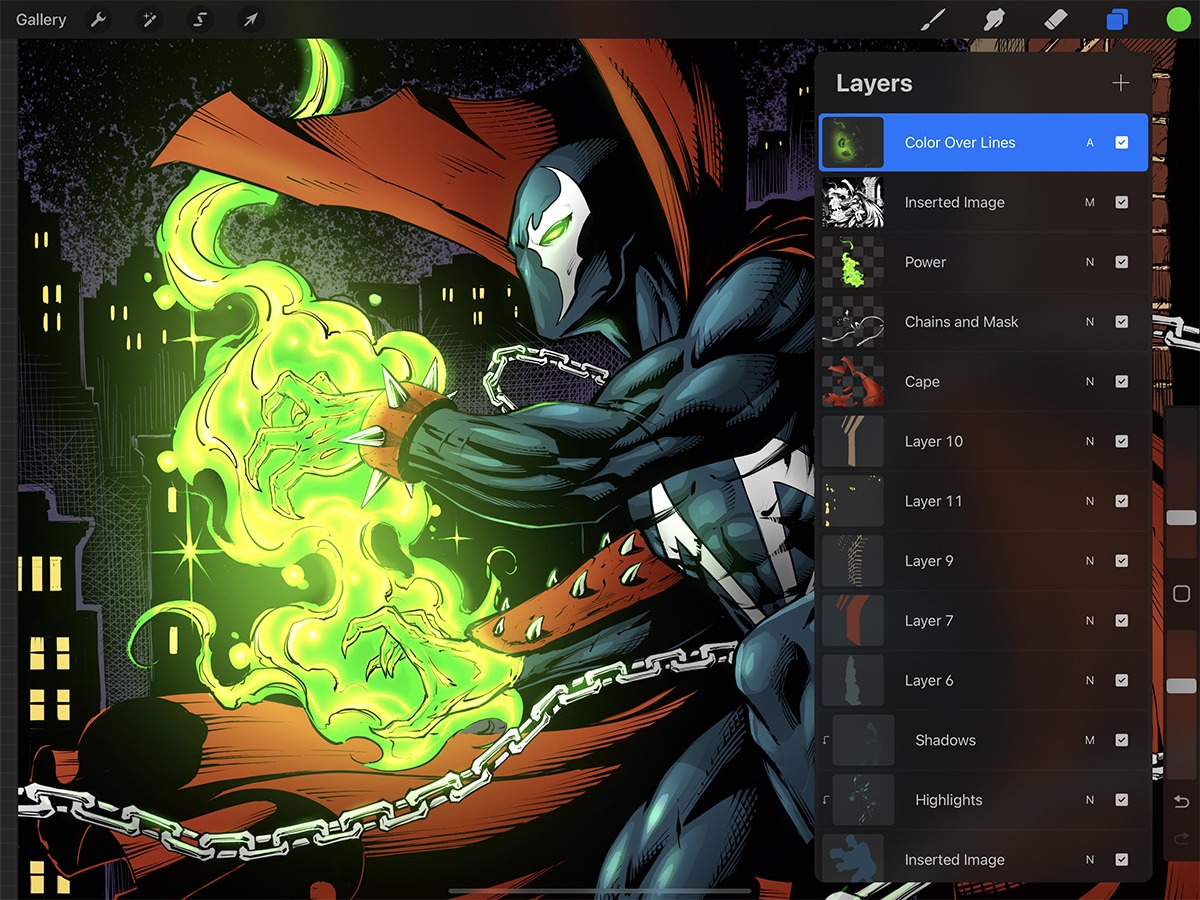
Now for some special effects! I love drawing powered superheroes since it is so much fun to visuals that appear magical and out of this world!
Procreate has some exceptional brushes for just that. If you go to the brushes library and scroll down to “Luminance”, you will see brushes that already have the blending mode set to “Add”.
This along with a few other settings will give you an immediate power effect. I like to start with a slightly darker tone, then pick one of these brushes with a brighter tone.
You don’t have to go too light because the blending mode will keep intensifying with each pass. For instance, if I keep applying yellow to lime green I will eventually get a white hot spot in the middle of the stroke. Great for energy effects but try not to over do it!
Notice I also added a layer over the line art. This is so that I can push back some of those vivid black lines and so that I can create a soft glow around the power effect.
Step 7 – Finishing Touches and Final Adjustments
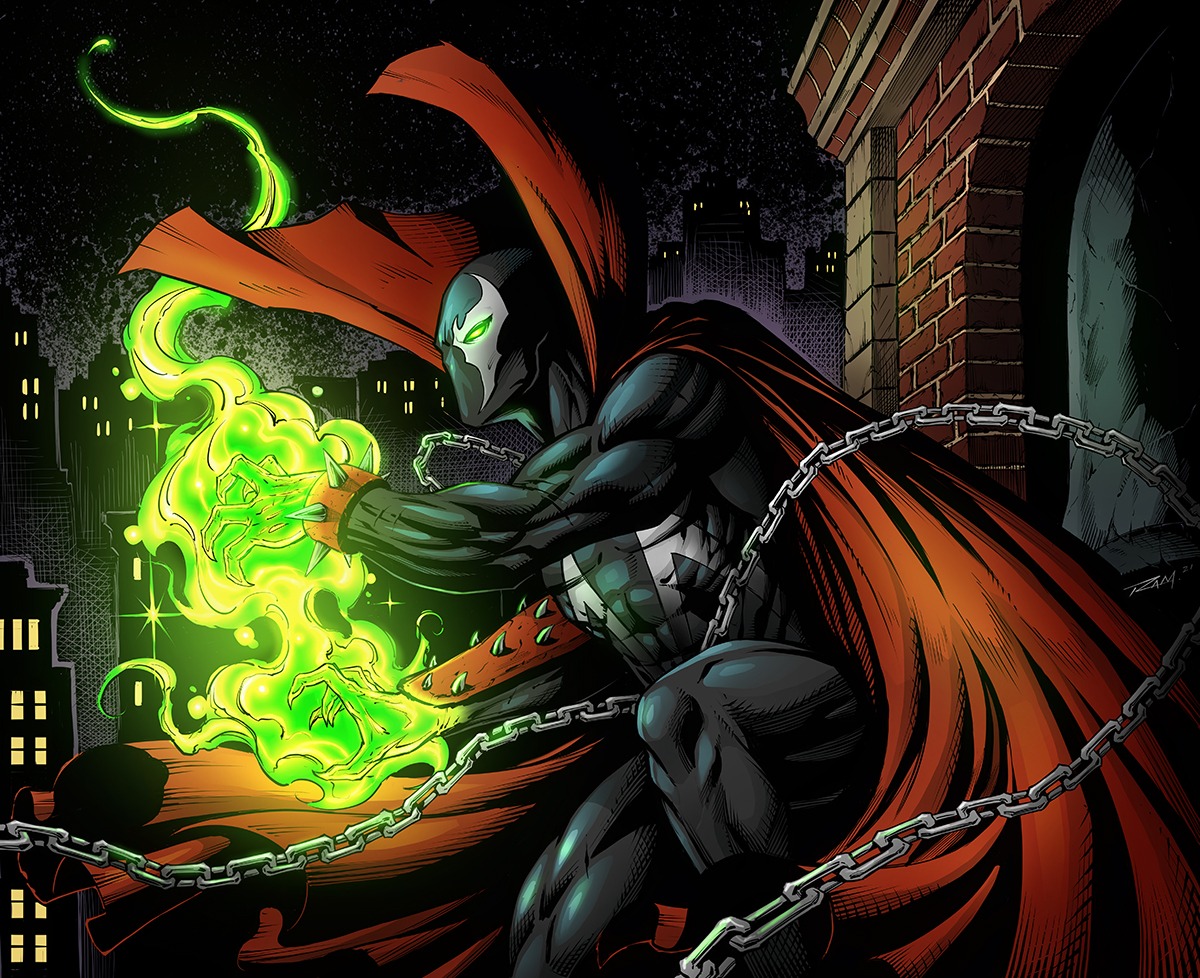
Now we repeat the previous steps on all the other areas of the illustration. For areas like the brick wall I use a very basic approach. A large soft airbrush to shadow the bottom and side while creating a small spherical highlight on the front surface.
Notice I also select the side planes of the wall and shade them down. It is helpful to try and think of all the different plane changes when applying light and shadow.
Once I have colored all the areas in, I can select the base flats and make some final adjustments. I thought Spawn’s suit was a bit too blue so I selected that layer and went to Adjustments > Hue, Saturation, Brightness and pulled the Saturation slider to the left as well as the Brightness slider.
Making the layer less bright and less saturated. This allowed me to quickly drop the blue out without negatively impacting the other layers or clipping masks.
Another final touchup that I like to do is to do a 3 finger swipe down > Copy All > Paste. This will take a copy of all the visible layers and put them together on one while leaving the others intact.
Then I create a copy of the flattened layer. Now I can drop the saturation over the entire layer but since I have the saturated version below I can use a large airbrush to soft erase and blend the two together.
I like to have certain areas more saturated with bright colors like the power and parts of the cape.
Then we can export the file by going to the wrench icon > Share > then select the file type you want. Procreate has lots of file types to choose from but I typically either used PSD’s or Jpegs.
Final Suggestions
It’s always a good idea to check your work on different screens just in case your colors are off.
Remember, Procreate captures a time lapse video of every artwork you create! Playback your videos and see what decisions you made. Sometimes those videos can really tell us where we went wrong or what we need to improve upon.
Go to Canvas>Canvas Information>Statistics to see how long the artwork took you to create. This can be a great way to gauge what type of art you can manage on a deadline!
Conclusion
Procreate is an amazing app and the iPad Pro and Apple Pencil is still one of my favorite ways to create comic art. In fact, I do most of my work on it these days.
Don’t worry if you like traditional art you can always use the strengths of this app in conjunction with your traditional work. I will be making more videos and blog posts on that very soon!
Procreate has lots of great features as I mentioned above and more on the way as they constantly release new updates. At the time of this post they are at version 5.2
They even just released the ability to draw and paint on 3D models. I can’t wait to try that one out!
What apps and programs do you use and why? Comment below and if you like the content please share it with your fellow artists.
Here is a in depth video explaining how I use Procreate to color comic book fan art.
Get my Comic Art Inking set for Procreate here
https://robertmarzullo.gumroad.com/l/JYdba
Thanks for reading and more on the way soon!
-Robert
Want to learn more? I have a full course on Coloring Comic Art in Procreate here – https://ram-studios-comics-art-school.teachable.com/p/how-to-color-comics-in-procreate?coupon_code=RAMCOMICS101&product_id=4763640
0 Comments