Hello My Fellow Artists!
I hope you are having an amazing day and ready to draw some art that leaps off the page! Let’s do this!
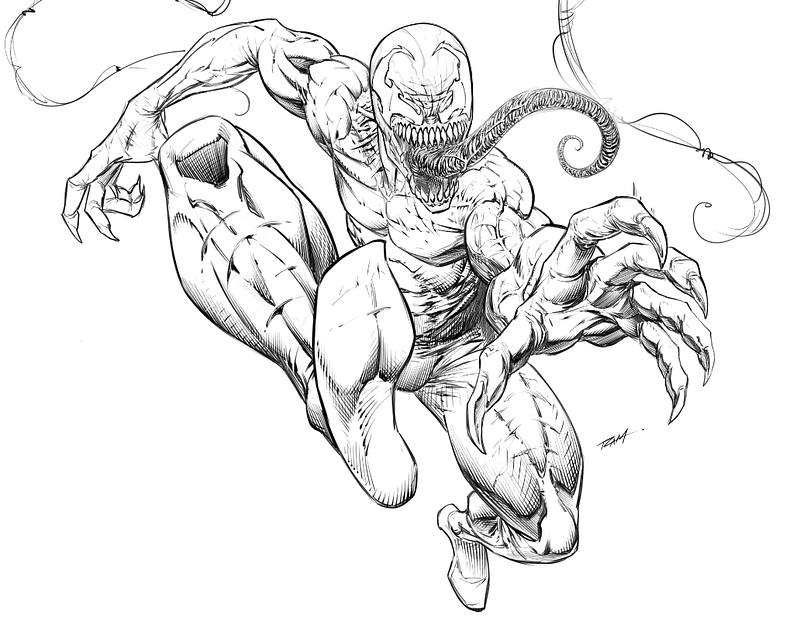
I absolutely love to practice foreshortening in my comic style art. To me it makes even the simplest styles look alive and impactful.
How to Simplify Foreshortening
One of the ways we can simplify foreshortening is to use primitive forms that are easier to turn on the page. This doesn’t do all the work for us but it can be a great way to develop your ability to envision depth on the page.
Start by creating some basic forms and positioning them in relationship to one another. Here are some of my warmups to give you an idea of what I mean….
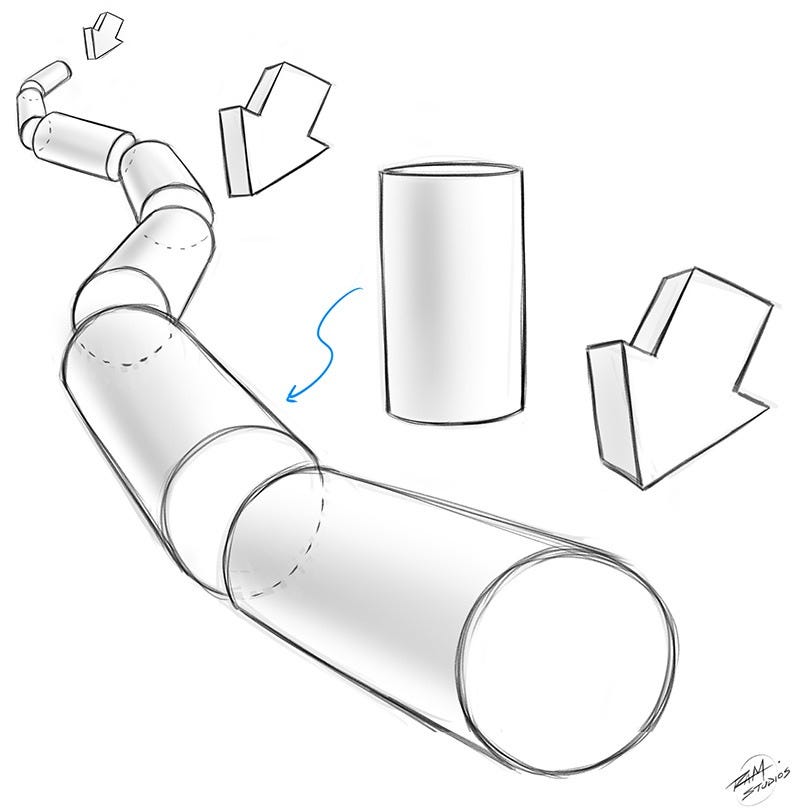
You can see with the drawings above that I not only tried to get a sense of perspective and depth in the drawings but also shifted the cylinders in different ways as they receded back into space.
This is great for drawing the figure since the segments of the body are never truly stacked and aligned.
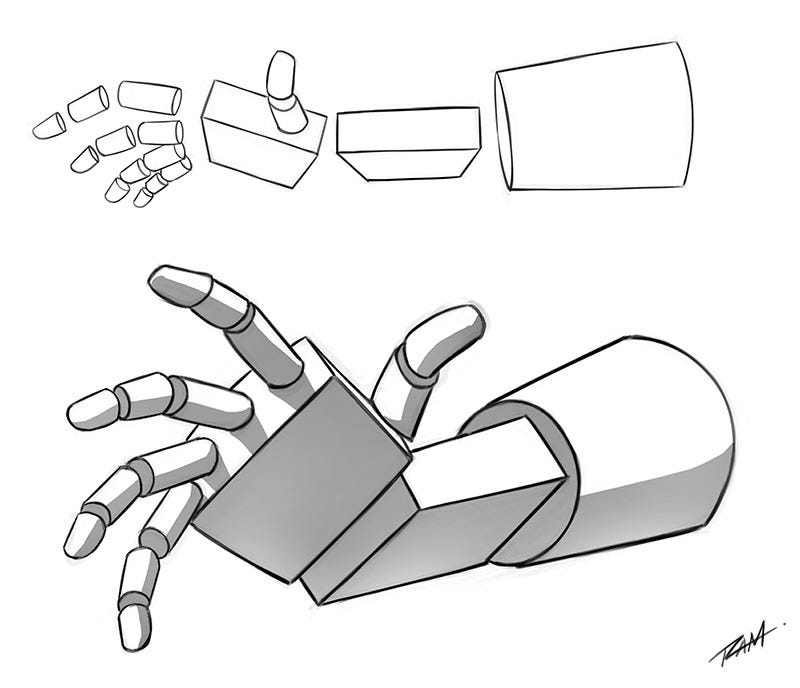
For this next example I want to challenge you to try to incorporate other three dimensional forms. Notice that the wrist in this example is better explained with a rectangular prism.
We can also use the same rectangular form for the palm area of the hand but at a different proportion. Then we need to push the scale of the hand area up as we move it towards the camera.
Mapping Distance in Perspective
Another thing that we need to practice is understanding and mapping distance in space. I know if sounds like we are talking about Perspective Drawing, right? We are because the same rules apply here.
When drawing the foreshortened forms of the body we tend to judge the distance improperly. Try this exercise below and see if it makes more sense….

Notice above that when we draw the rectangle parallel with our view that we can draw diagonal lines from corner to corner and find the center point.
As the rectangle recedes into the distance the center point is now much further back because of perspective.
We can use this same basic form of measurement and relate it to parts of the body. Notice in the arm example I used a 3D prism to map center and then envisioned the arm drawing in relationship to that space.
This showed me that the forearm needed to be larger by comparison to that of the upper arm. In fact, I could have made the forearm even larger and also increased the size of the hand as well.
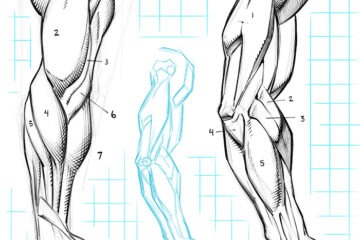
Use Cross Contour Lines to Explain the Forms in Space
Another thing that we can focus on are Cross Contour lines. These are lines that we draw through the forms that help to explain the dimension and direction of the volumes.
When drawing the body from a foreshortened perspective like the illustration below, the cross contour lines help us to visualize and correct the work more effectively.
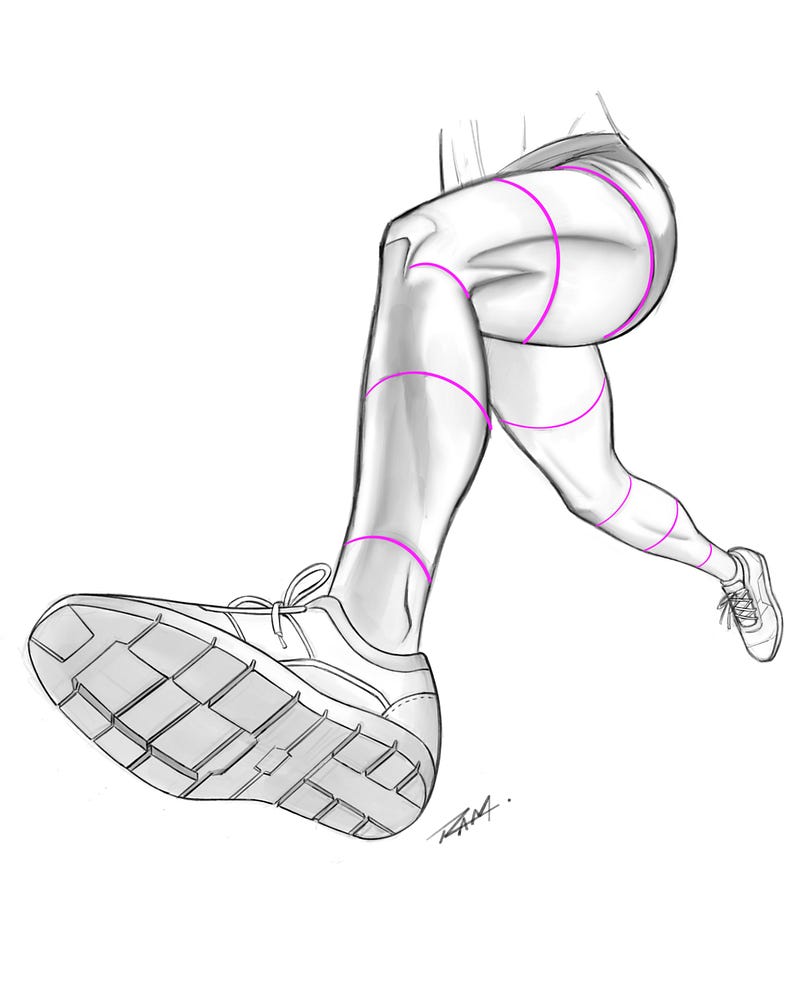
Notice that the pink lines wrap upwards on the leg closer to the camera and they wrap down and away on the leg moving away from the camera.
Learn to spot cross contour lines and also how the anatomy overlaps other areas more dramatically as the body is foreshortened.
Here is a couple of videos that I created to help you on the topic of Foreshortening….
Here is another video on Foreshortening explaining how to draw the body with basic forms —
I hope you enjoyed today’s drawing tutorial and let me know if you have any questions.
Thank you for viewing my post and have an awesome day! 🙂
Robert A. Marzullo
Ram Studios Comics
Check out my Online Art Courses here and Level Up Your Skills Faster with Guided Lessons — http://online-courses.ramstudioscomics.com
If you enjoyed this post then you may also like this one on Drawing Dynamic Figures…
0 Comments