Are you tired of Drawing Flat Faces or Eyes That Don’t Line Up?
Mastering the Andrew Loomis method is an effective way to draw consistent portraits. I use this method more for stylized renditions but the structure is still very useful all the same.
Many artists get confused by the complexity of the Loomis head and I must admit, it does take some time before it makes sense. One of the things to consider is that you can use as much or as little of it as you need.
For today’s tutorial we will focus on using the Loomis method when placing the eyes.
If you want to follow along with the video you can watch it here on my Youtube channel — Watch it here!
The Benefits of Using the Loomis Method for the Eyes
When drawn correctly, the Loomis method makes the alignment of the eyes far easier to accomplish. These are the benefits that I see when taking this approach :
Perfect Symmetry — It stops you from drawing one eye higher than the other, even at difficult angled views as I will demonstrate in this video lesson.
Anatomical Depth — It forces you to realize that the eye sockets are recessed pockets of the skull and not flat areas on a piece of paper.
Consistent Proportions — The structure provides you with a geometric sense of proportions that typical organic drawing can lack.
Let’s put this method to the test and see if it works for you!
Step 1 — Drawing the Loomis Head
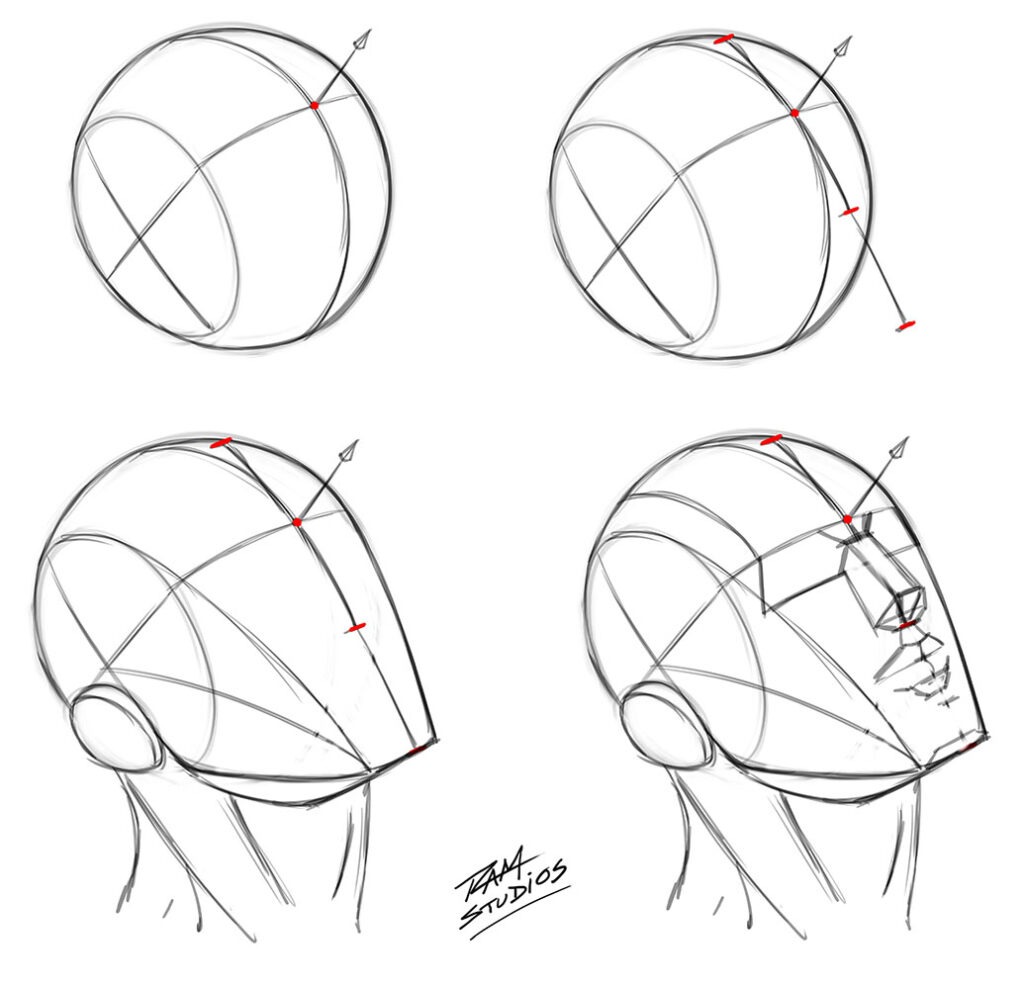
I added this step by step resource since I glossed over this part during the video. Mainly because I have covered this process in my previous lessons.
The main thing to pay attention to here is that we can use the Loomis method to find the 1/3’s of the head.
This allows us to place the features much more precisely and requires less guess work.
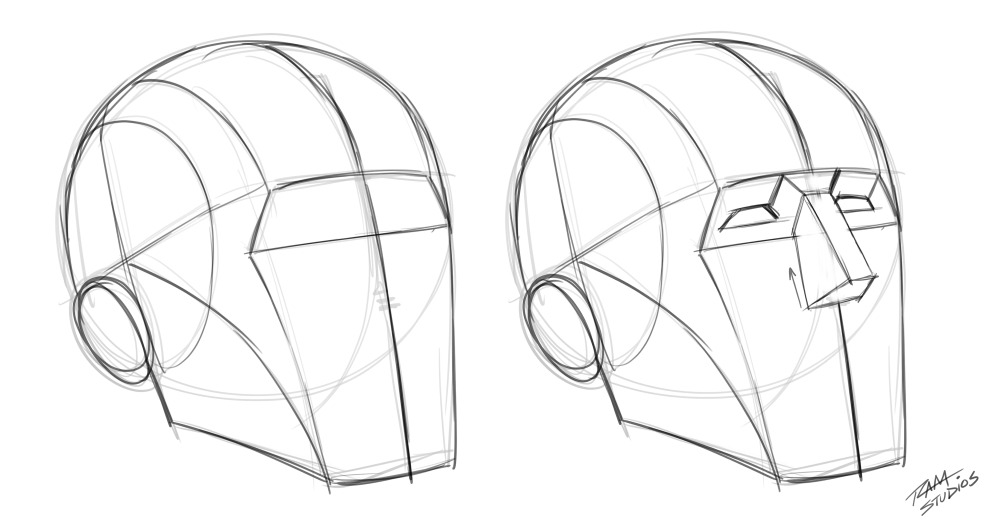
Step 2 — Defining the Plane Changes of the Eye Sockets
This gives us a much better understanding on how to proceed with drawing the eyes.
It eliminates the novice mistake of drawing eyes that appear to sit flush on the face, instead of recessed into the eye socket cavity.
Here is an image from part of the video where I show you how to define this area –
Step 3 — Drawing Organically Through the Template
So now we have a great point of reference to draw the head and face more confidently but what happens when our drawings come out robotic and stiff?
Templates are great but we have to practice seeing through them and drawing with more organic concepts in mind.
Even the face needs a certain amount of well placed symmetry to look and feel alive.
So practice drawing lines that don’t stick to the head template that you have created.
Here is the drawing that I created in the video to show you what I mean….
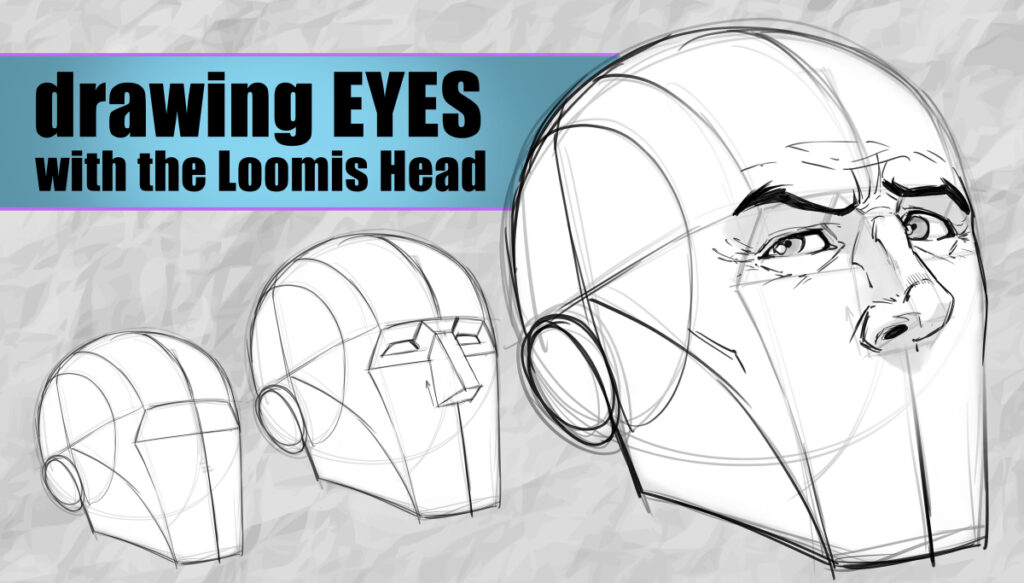
I purposely put a bit of exaggeration into the expression. Not all of your characters will require this but little things like raising an eye brow or squinting can make the character look more interesting.
So practice drawing a variety of expression over your head templates and see what you can come up with. It’s a pretty fun way to improve your skills!
I hope this tutorial has helped you with this ever popular method for drawing our characters.
Get my FREE Heads Drawing PDF Guide – Click here…
Thanks for following my lessons and good luck with your art!
Robert A. Marzullo
Ram Studios Comics
0 Comments